Need training at your office? Request a quote for custom training.
Adobe FrameMaker: More on Reference Pages
by Barb Binder, Adobe Certified Instructor on FrameMaker
Updated: Jan 21, 2021
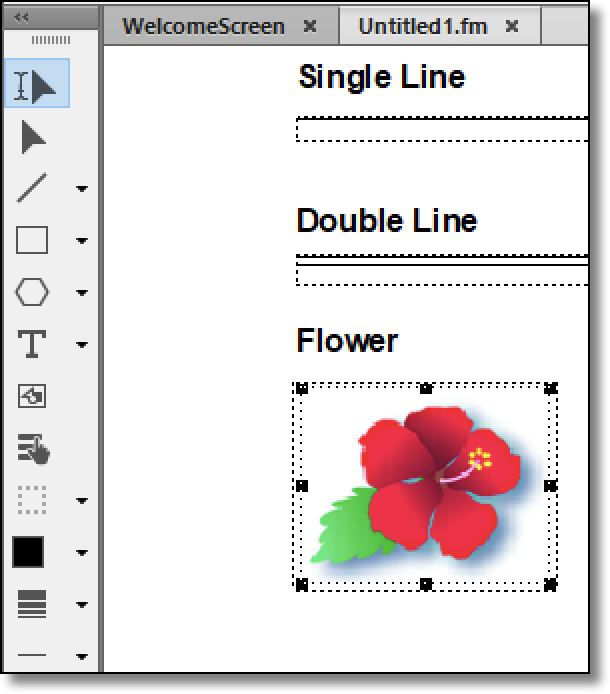
In a previous post, Adobe FrameMaker: What are Reference Pages?, I talked a bit about the most basic reference page, called Reference. In a new default document, when you chose View > Reference Pages, you land on a page that looks like the one below, and you learned about the purpose of the top two frames. So what about the second two frames? And the entire rest of the page, which is currently empty?
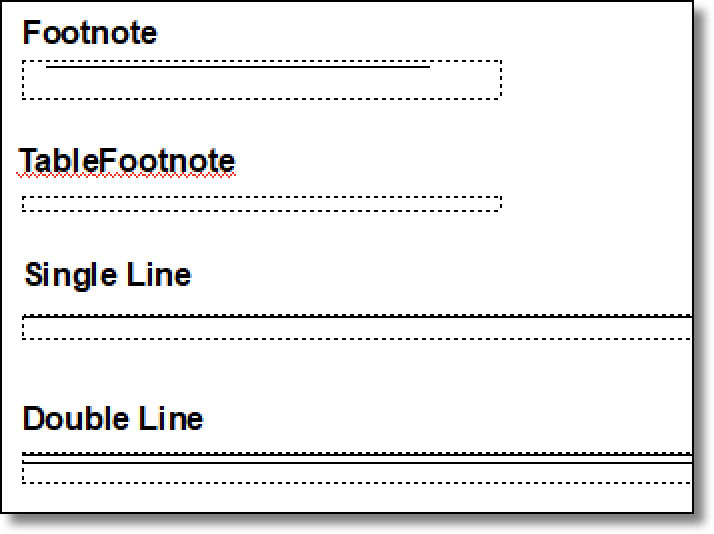
The second two frames are used to place a repeating graphic element (in this case a single or double ruling line) either above a paragraph, below a paragraph, or both.
Before we try, you need to remember one thing about the labels: the labels above each frame are strictly there for your convenience, they don’t do anything except display the names of the frames. What matters is the name assigned to the frame underneath the label. To see a frame’s name, click on the edge to select it and look at the middle of the status bar at the bottom of the page.
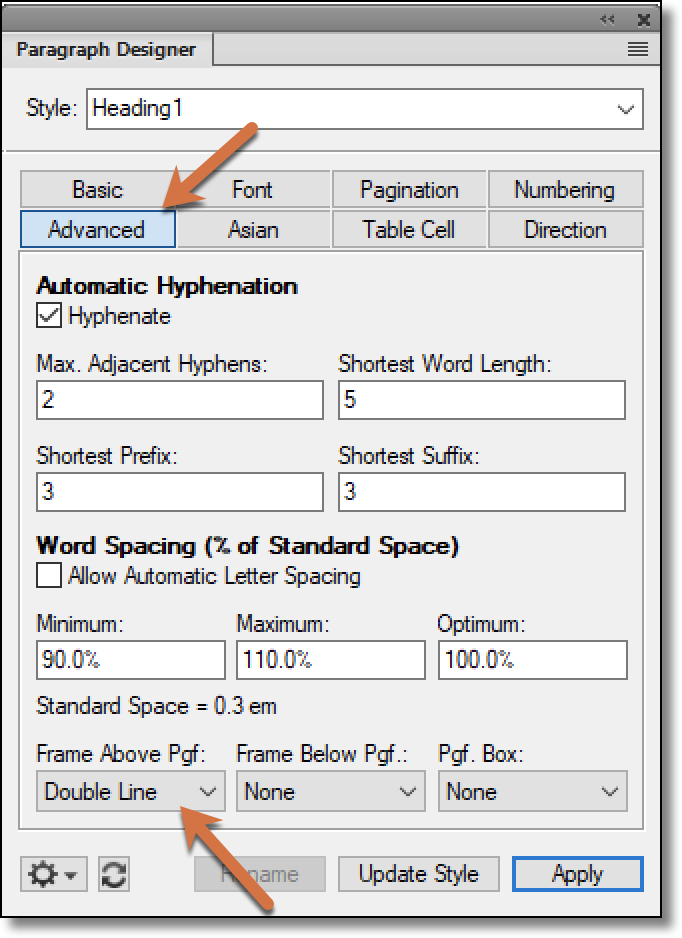
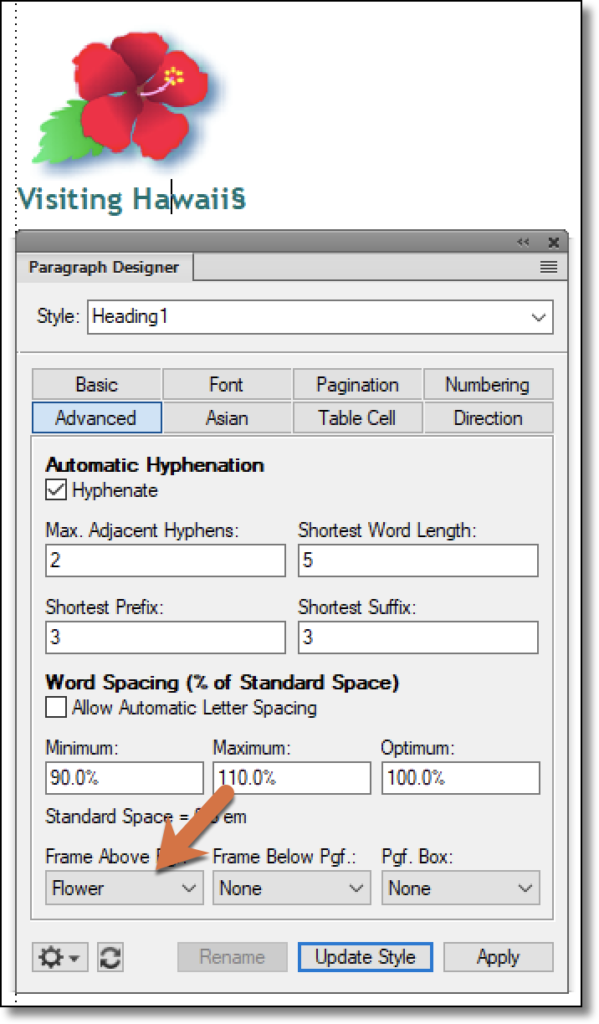
So, open a document with a subheading format and let’s give this a try. Place your cursor in your top level subheading and open the Paragraph Designer (Ctrl+M). Navigate to Advanced. At the bottom of the dialog box, click the Frame Above Pgf or Frame Below Pgf drop-down menus and you will see that there is a list of frames from the first reference page. Select one and then click Update Style to place a rule above or below all your subheads. You can use Edit > Undo to remove them after you see how this works.
So what if you’d rather use a different graphic above or below your subheads? A nice Hawaiian flower perhaps? Here’s how:
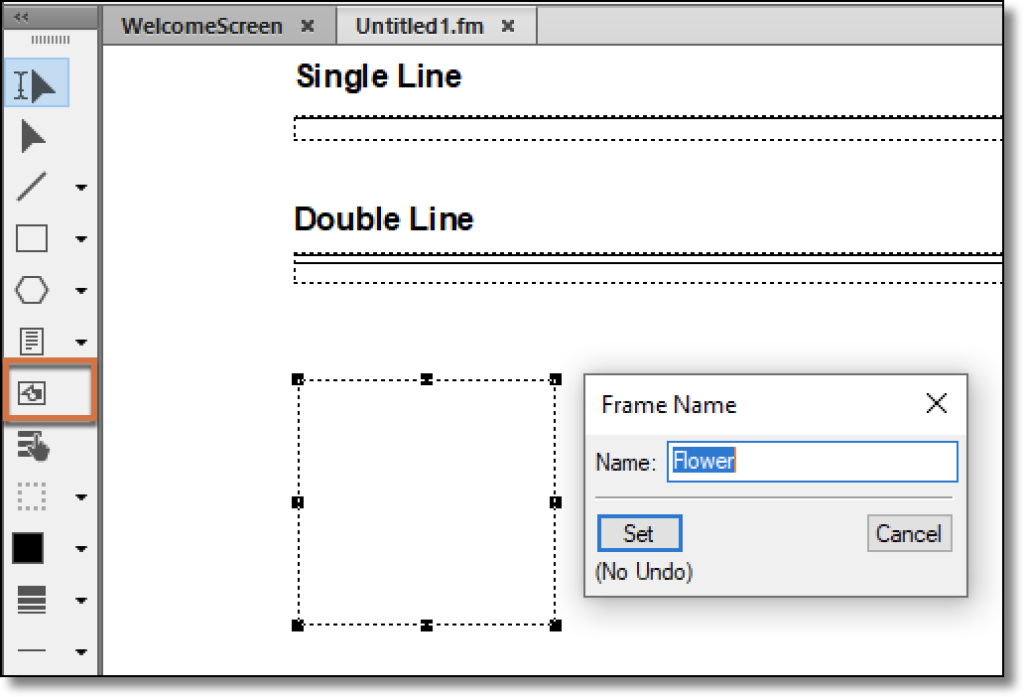
- Choose View > Reference Pages
- Choose Graphics > Tools to show the Graphics toolbar
- Use the Graphic Frame tool to draw a frame on the page, under the other ones. Name it Flower.

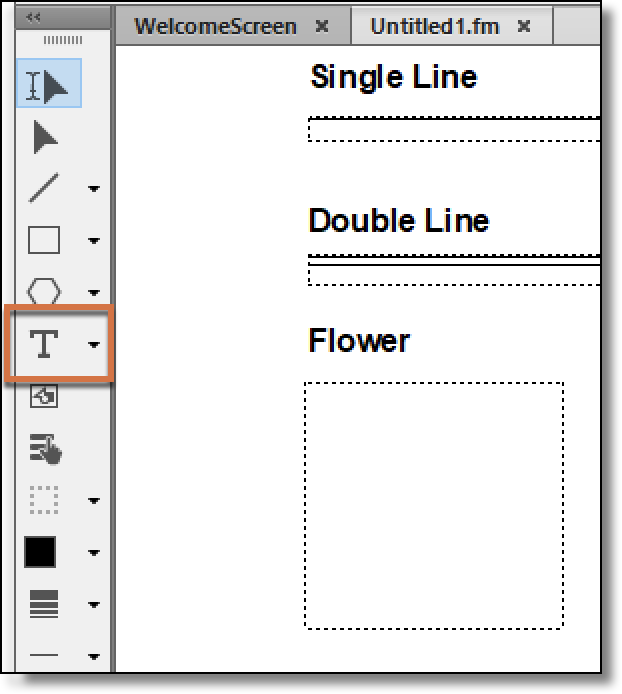
- Use the Text Line tool to add the optional label above the frame.
- Use the Select Object tool to select the frame and import an image into the frame. You may need to adjust the size of the image, the frame, or both.
- Choose View > Body Pages
- With an insertion point in your subhead and the Paragraph Designer > Advanced open on your screen… click the Frame Above Pgf drop-down menu, choose Flower and then click Update Style. Now there is a custom image above each of your subheads.
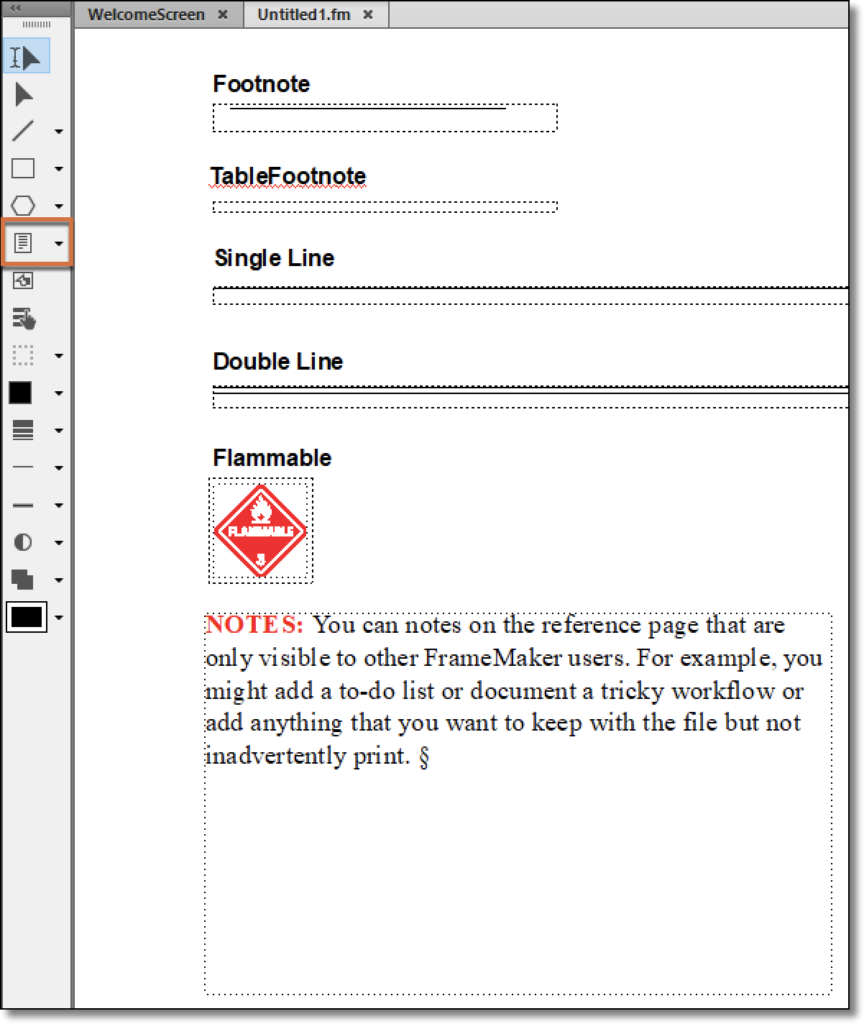
Now, what about the rest of that page? You could use it to add additional graphics you’d like to reference on the Body Pages or you could draw a text frame and leave notes for your co-workers about the job.
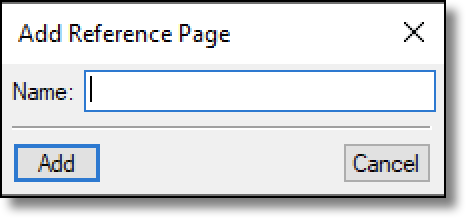
Finally, if you fill up the first reference page and need more room, you can add additional reference pages with Insert > Add Reference Page.
Looking for more information on using reference pages in FrameMaker?
Adobe FrameMaker: What to know about working with generated files
Adobe FrameMaker: Including chapter numbers in a table of contents
Adobe FrameMaker: Removing bold from page numbers in a table of contents
Adobe FrameMaker: How to Create a Mini-TOC for Individual Chapters
This page saved both my cranium and the wall from further damage. Thanks.
Thanks so much for describing this. That is some horribly arcane UI there!
How do i create a graphic in a reference page that:
* contains alternate text
* allows the placement of text to wrap around the graphic
These are note/tips/warnings that display in margin and used repeatedly throughout the document.
Amazing. I just created a Head 1 with a flame graphic and have enough knowledge of reference pages to make me dangerous.
LOL. Way to go, Richard!
~Barb