by Barb Binder, Adobe Certified Instructor
A nested style allows you to nest a character style in a paragraph style, so that you can assign both with a single click. A classic use case is a run-in head, where we emphasize the first few words of a paragraph.
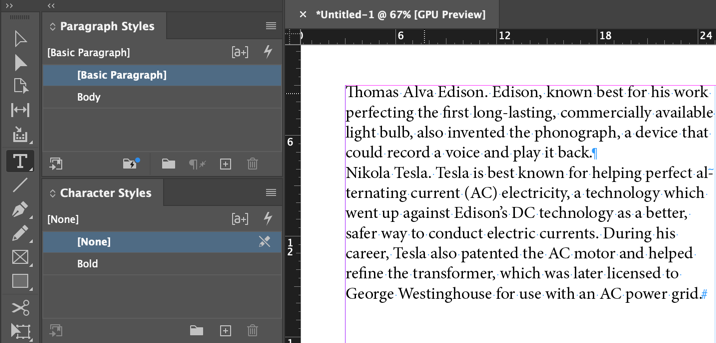
Run-in head example
The image below shows headings embedded in the beginning of both paragraphs. Each head is terminated with a period. Note the styles at left: there is a paragraph style called Body and a character style called Bold. Neither are in use yet.
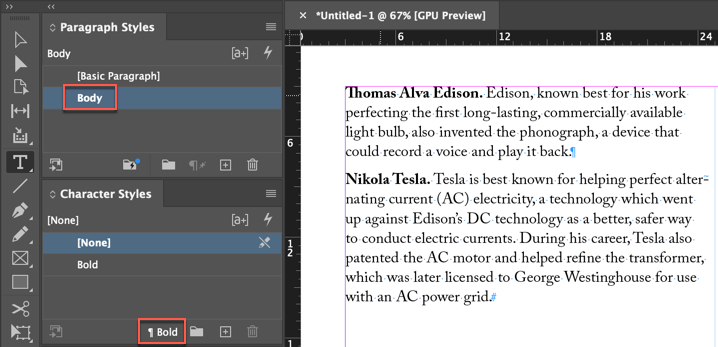
Simply assigning the Body paragraph style to these two paragraphs changes the font size. leading and spacing after (normal paragraph style stuff) but also applies bold to the first sentence in each paragraph, automatically.
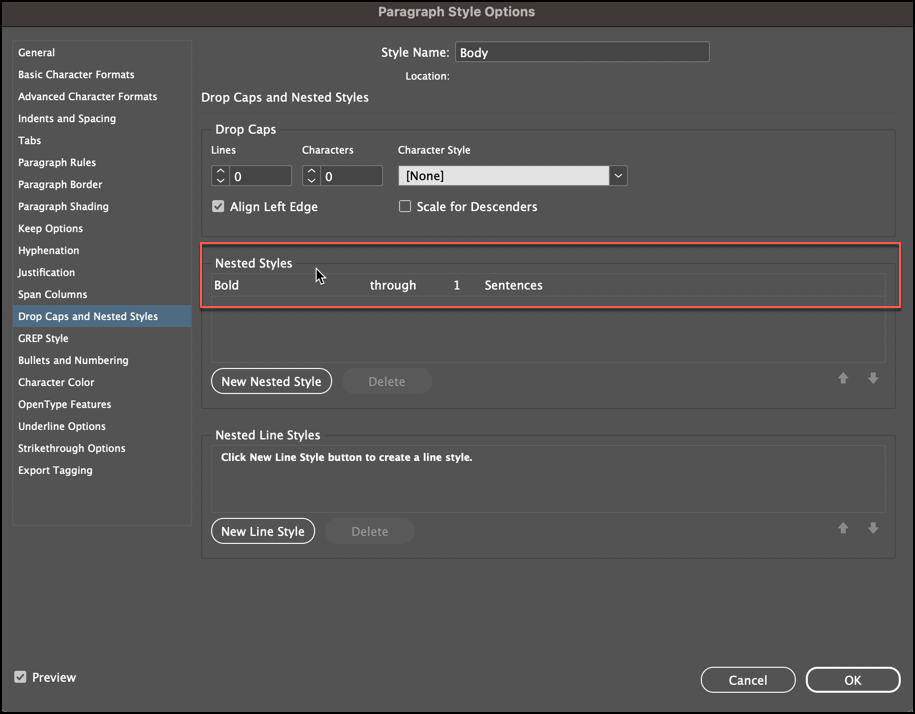
How? With a nested character style. You add a nested character style to a paragraph style by clicking the New Nested Style button in Paragraph Style Options > Drop Caps and Nested Styles and then defining it. You can have zero, one or more nested styles defined for one paragraph style.
If you examine the nested style definition for Body, it shows Bold through 1 Sentences. In English that says, hey InDesign, assign the Bold character style from the beginning of the paragraph through the end of the first sentence, including the period. This is part of the paragraph style definition, so once it is set up, it happens whenever you assign the Body paragraph style.
The anatomy of a nested style
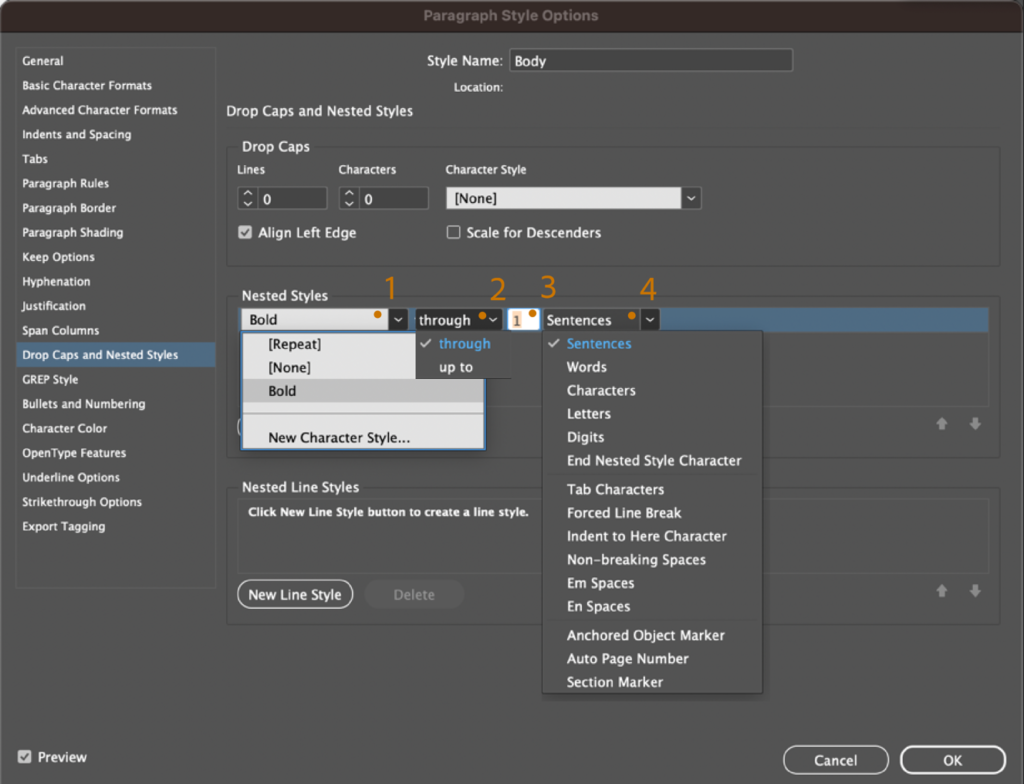
A nested style is made up of 4 individual specifications, numbered in the screen shot, below.
- Select the character style you wish to apply. If you don’t have one, you can choose New Character style to create one.
[Repeat] is explained here, and [None] is explained here.) - Choose between Through and Up To to specify an end point. (If you don’t want the end point character to be included in the formatting, choose Up To instead of Through.)
- Specify the number of end points you need to match. (i.e., 1 Sentence or 2 Sentences)
- Chose the endpoint. (You are not limited to the endpoints listed in the menu: you can type any character into the text box, such as a colon or a period, to end the nested style. If you type multiple characters, any of those characters will end the style. For example, if your run-in heads end with either a hyphen, colon, or question mark, you can type -:? to end the nested style where any of these characters appears.)
Nested styles are a much more efficient way to assign a character style to multiple paragraphs when you can distinguish a simple pattern, as in this run-in head example. Note that nested styles always start at the beginning of a paragraph and end where you tell them to.
For more information on nested styles and nested line styles
Adobe InDesign: Multiple nested styles in one paragraph style