Need training at your office? Request a quote for custom training.
Adobe Photoshop: Using a Mask on an Adjustment Layer
By Michael Meyer, Professional Photographer & Former Photoshop Student
This is a technique that’s a little bit advanced but, once you get the hang of it you’ll want to use it a lot because of its flexibility and power.
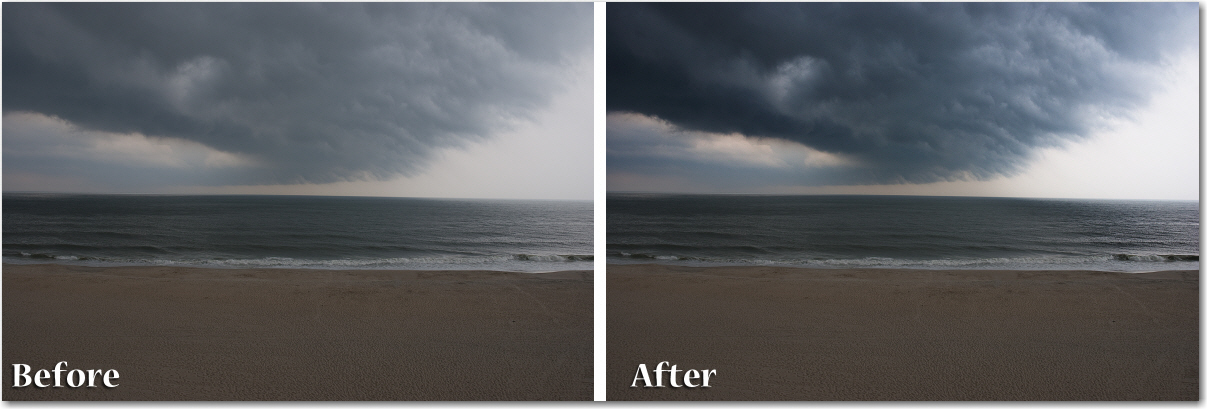
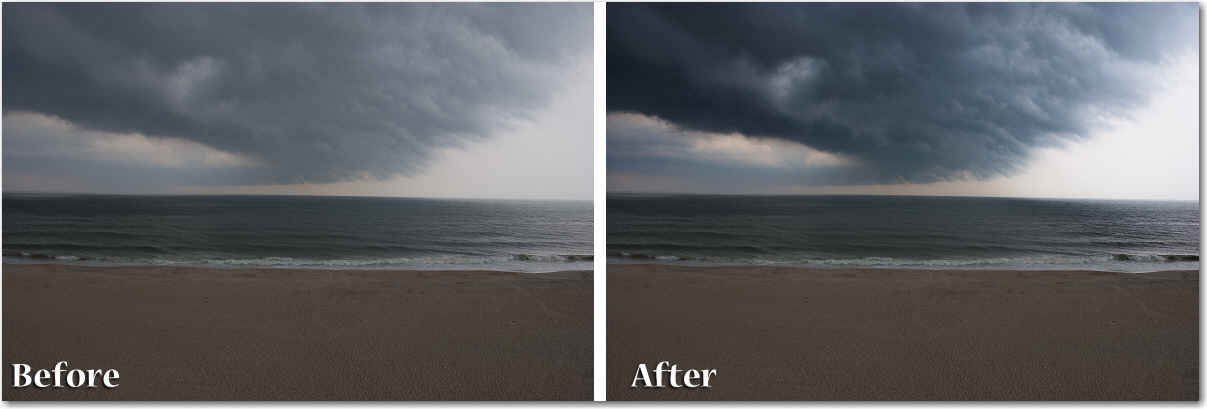
Here’s the “before” shot of a nice storm rolling in at the beach. (I love storms at the beach, by the way.)
I wanted to add some contrast and darken the clouds to better accent the impending doom, but I don’t want to make any permanent changes to the image. The best way to add non-destructive edits (that can be removed or modified later) is to add an adjustment layer that floats over the original image. Let’s give it a shot:
- Open up the image you wish to modify.
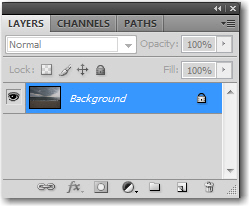
- Click on the Background Layer in the Layers panel.

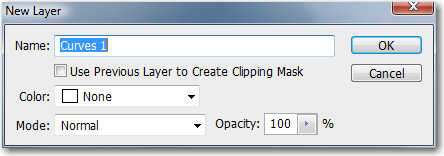
- Select Layers > New Adjustment Layer > Curves. You can give the new adjustment layer a descriptive name, or just accept the default name as shown below. Click OK.

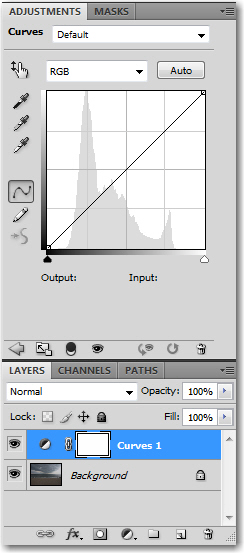
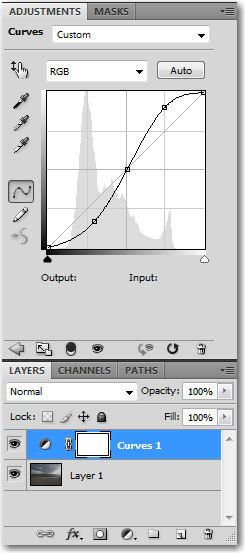
- Take a close look at the panels on the right of your screen (and shown below). You‘ll see the new Curves adjustment layer in the Layers panel, and the Curves Adjustment panel opens up on top.

- A quick way to adjust the overall contrast in an image is to raise the highlights and lower the shadows into a classic “S” curve. Remember, the steeper the curve, the higher the contrast.

The bad news is that by the time the clouds and sky look good, the beach and parts of the water are now way too dark.
The good news? It’s a very easy fix. Take a second look at our new adjustment layer.
![]()
See that white rectangle on the right? That’s a mask. The white color indicates that our adjustment affects the entire image underneath. If we add a little black paint to the mask we can selectively control where our adjustment is applied. Here we go:
- Select the Brush tool from the Toolbox.

- Select a large, soft brush from the Options Bar. (Remember that you can tap the [ and ] brackets to easily make any brush larger or smaller.

- Press the letter “D” on the keyboard to reset the default foreground and background colors.

- Click on the mask icon on the Adjustment Layer in the Layers panel.

- Start painting over the beach. The black paint isn’t showing up on the image, it’s showing up on the mask. Memorize this: black hides, white reveals. As you continue to paint black on the mask, you are hiding the Curves Adjustment on the image.

- If you go too far with the black, just tap the “X” key on the keyboard to switch white to the foreground and paint some white back in. In this example, I painted on all of the beach and the left part of the water to brighten those areas up.

- If you want to see a full-size view of the mask, hold the Alt/Opt key as you click on the mask. You can paint on the mask in this view, if you like, in case you missed a corner. To restore the image, just hold the Alt/Opt key as you click on the mask one more time.

- Voila! Much more dramatic, don’t you think?

This is a very simple example of painting on a mask, but you can work with multiple adjustment layers and paint on the various masks to limit your adjustment to certain areas. Try doing that with an enlarger in the darkroom. Let me tell you, it would take a considerably larger amount of time.


I was trying to find some information on working with masks in PS and came across your blog.
I’ve been mucking around on my own, but haven’t been very successful.
Through the help of your step by step example, I’m starting to get the hang of it.
Just needed a simple enough step by step example to get me started
Thanks
I love editing images but I am not good from using the Photoshop. I think this tutorial will help me to do some toning to correct this color problem. I took a picture of a wisteria blossom last week but the color processing algorithms in my Canon camera don’t render the blossoms the correct shade of purple/lavender, instead coming up with a light blue. I think using layers in Photoshop to create a layer mask is such a great Photoshop trick.
Thanks for sharing great technique, I used to do it with burn tool, this is a lot more professional approach:)