by Barb Binder, Adobe Certified Instructor on Photoshop
When I need to add text inside a custom shape, I would reach for either InDesign or Illustrator. Some people either don’t have either of those two applications, or they haven’t gotten around to learning them yet, but they are using Photoshop. In that case, here are the steps:
- Select the Custom Shape tool.

- Pick Path from the drop down menu on the left side of the Options bar.
- Open the Shape menu from the middle to right side of the Options bar.
- Click the little gear in the top right corner and add some more shapes. If you want to see all of them, click All and Append. In this case, I chose Banners and Awards, then clicked Append .
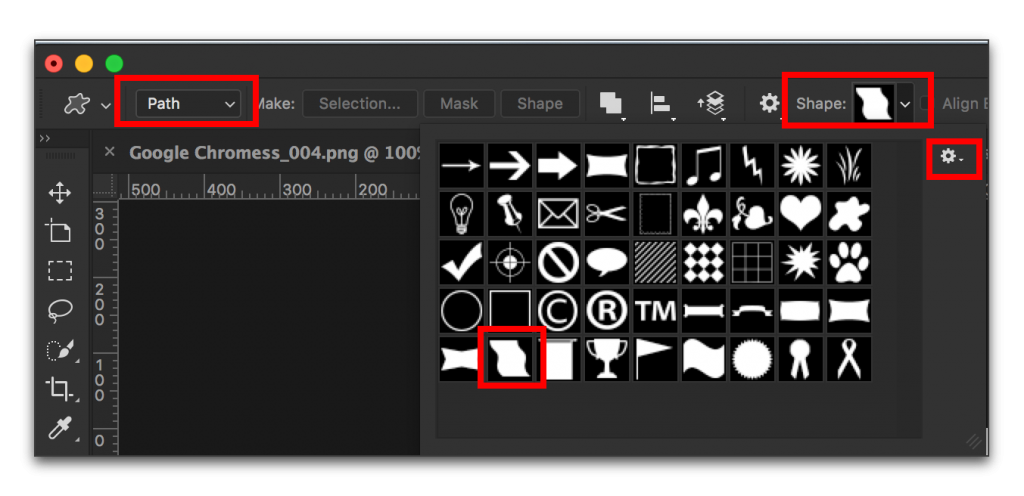
- Draw a shape on the page. I chose Page. (If you want, you can manipulate the path with the Direct Selection tool.)
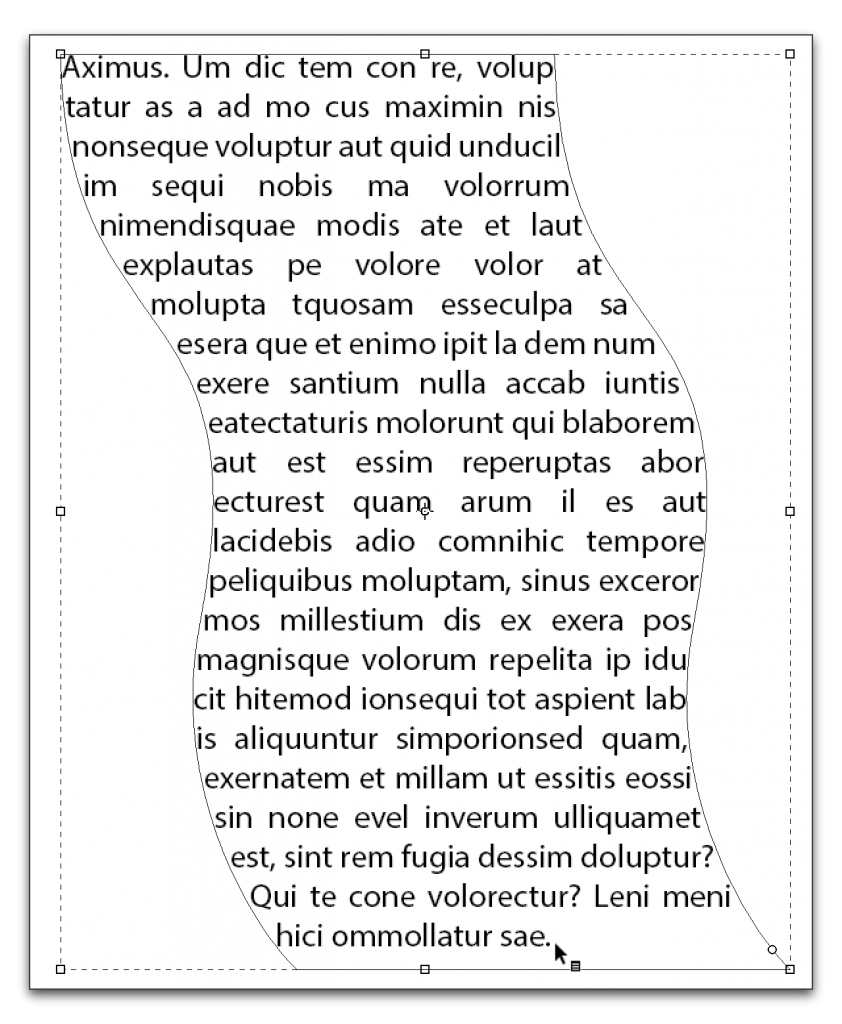
- Switch to the Type tool. When you hover over the path, your cursor turns into a circle, indicating that if you click you will be able to start typing into the path.
- Click, type and format:
Of course, if you know how to draw with the Pen tool, you aren’t limited to the Custom Shapes. Draw any shape you like on your path, and then return to step 6.