Need training at your office? Request a quote for custom training.
Adobe FrameMaker: Master page basics
By Barb Binder, Adobe Certified Instructor on FrameMaker
Adobe FrameMaker offers three sets of pages: body pages, master pages and reference pages.
- Body pages display the content that is seen by the reader and are typically numbered 1, 2, 3, 4, etc. Body pages make up the bulk of a FrameMaker document.
- Master pages hold the repeating information like headers, footers and repeating graphics that will appear on the body pages. Examples of master page content includes page numbers, document title, section titles.
- Reference pages hold content that either FrameMaker needs to refer to or you want to refer to. For example, generated files (like a table of contents) store their building blocks on the reference pages.
You can navigate from one page group to another using commands found at the bottom the View menu.
Defaults
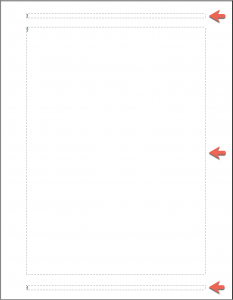
A default master page in a new document has three frames:
- A background frame at the top
- A template frame in the middle
- A background frame at the bottom

Background frame properties
A background frame holds content that repeats in the exact same place on multiple body pages. You can type in static content into a background frame or you can add a variable that will change from body page to body page. Common examples of master page variables include the page number variable, the date variables, and the Running H/F 1–Running H/F 18 variables that are used to collect content from the body pages to add to the running heads. The term running heads refers to both headers and footers).
A background frame will not be visible or editable on the body pages. The content will be visible but not editable on the body pages.
Template frame properties
A template frame is used to hold the content on the body pages, but it is defined on the master page. A template frame is assigned a flow tag, and in a new default document, the flow tag assigned is called Flow A. Template frames have Autoconnect properties enabled, which allows FrameMaker to automatically add a new pages at the end of a document as you add content.
Note: A common mistake that new users make is to add a disconnected page when they want to add new content. Not only is unnecessary—because Flow A has Autoconnect turned on—but this will add a page that does not connect to the page before it or after it, causing reflow issues down the road. Once in a while there may be a reason to add a disconnected page, but for most users it is entirely unnecessary. Just add the new content, and the text will reflow to accommodate it—that’s what Autoconnect does.
How to change frame properties
Sometimes you will need to change a frame’s size and/or position. You can do so as follows:
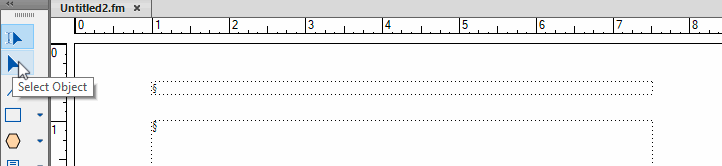
- Select the frame with the Select Object tool from the Graphics Toolbar. Once the frame is selected, you can move it by dragging inside the frame boundary, or resize it by tugging on any of the eight sizing handles.
- Control+click to select the frame. (This is a shortcut to temporarily access the Select Object tool from the Graphics Toolbar without having to open up the toolbar.) Once the frame is selected, you can move it by dragging inside the frame boundary, or resize it by tugging on any of the eight sizing handles.
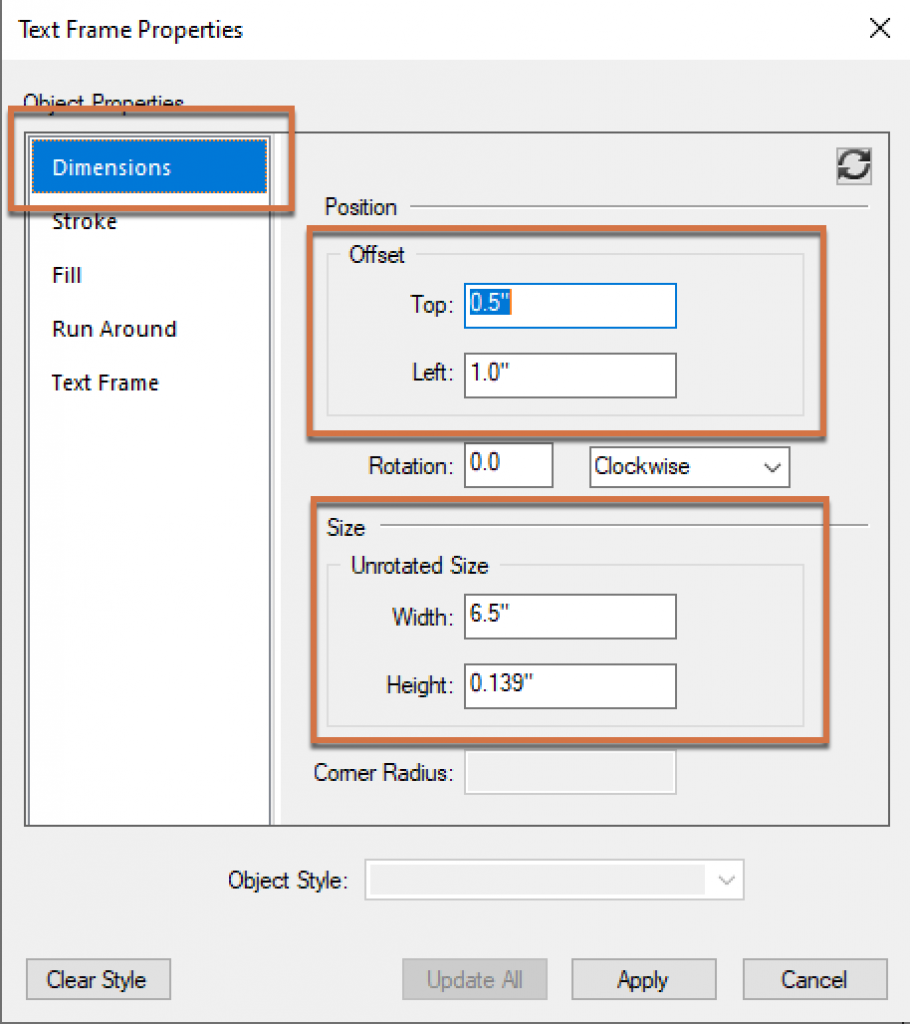
- Select the frame as mentioned above and choose Graphics > Object Properties to open the Text Frame Properties dialog box. Click the Dimension category and use the Offset values to precisely position the frame, and the Size values to resize it.
- Select the frame as mentioned above—or just click an insertion point inside the frame—and choose Format > Customize Layout > Customize Text Frame to open the Text Frame Properties dialog box. Click the Dimension category and use the Offset values to precisely position the frame, and the Size values to resize it.
- Sometimes you will need to change the flow tag or the Autoconnect properties for a template frame. You can access these commands in Text Frame Properties. First, select the frame as mentioned above then choose either Graphics > Object Properties or Format > Customize Layout > Customize Text Frame. Choose Text Frame in the category list on the left.
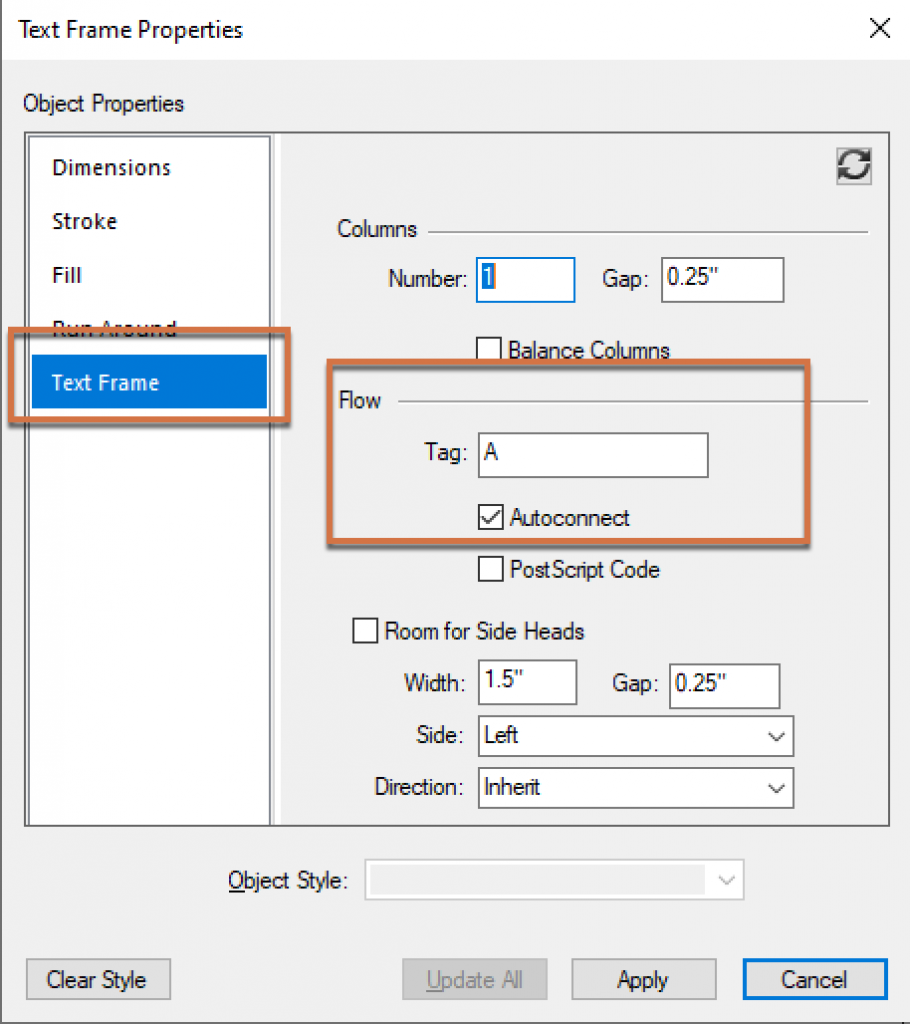
If you have a background frame that needs to be a template frame, you can simply add a flow tag that is not currently in use and enable/disable Autoconnect properties. If you have a template frame that needs to be a background frame, just delete it and redraw it.
How to add a new frame
If you remove one of the default master page frames and need to add it back in, or simply decide that you need an additional frame, you can add one using the Text Frame tool, located in the Graphics Toolbar.
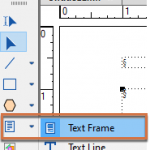
- Select the Text Frame tool.
- Draw a new frame by dragging the mouse to create a rectangular frame. If you need to adjust the size or position, see How to change frame properties, above.
- When you release the mouse button, FrameMaker will ask you if you need a background frame or a template frame. If you aren’t sure which one to pick, there are described above.
How to add a repeating graphic
If you would like to add your logo or another graphic element to the master pages, add the graphic to the page and not inside and anchored frame.
- Click in the page margin to make the page active.
- File > Import > File to import the graphic.
- Drag the graphic to the desired position.
More on working with master pages
Using variables in headers and footers
Adobe FrameMaker: When Chapter Titles are Too Long for a Running Head
Working with custom master pages
Adobe FrameMaker: Automatically Assigning Custom Master Pages
Rotating pages
Adobe FrameMaker: Adding a Landscape Page to a Portrait Document
I am trying to convert a Word document into a FrameMaker document and the first version I sent out for review came back with the footer needs to be .3″ from the bottom. The ruler function measures in 1/4″ measurements so I am ballparking it. Is there a way to calculate what the position would be to have the footer .3″ from the bottom of the page?
Hi Dustin:
I would specify the position by selecting the frame and entering the exact position in Graphics > Object Properties > Dimensions.
Paper size – position = top offset.
~Barb