Need training at your office? Request a quote for custom training.
Adobe FrameMaker: Creating PDFs
by Barb Binder, Adobe Certified Instructor on FrameMaker
Updated Nov 5, 2016
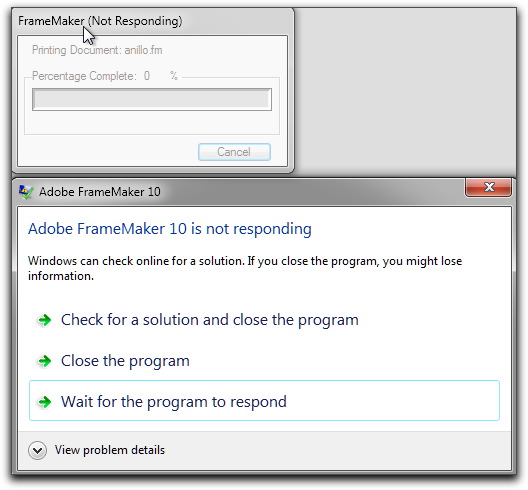
This should be so easy, right? And usually it is, but I just received this inquiry from a former Adobe FrameMaker 9/10 student:
I am sorry to bother you, but I have a quick question. I have FrameMaker 10, so does my co-worker. I cannot print to a PDF, yet I can do it from my co-worker’s computer. The only difference is that I have Adobe Acrobat X version 10.1.2 and she has 9… is there a magic setting I am overlooking?
There are times when I’m really glad I’m an Adobe Acrobat Certified Instructor, and this is one of them. Creating a PDF from FrameMaker should be so simple. After all, Adobe owns both products. However, my 25 years of FrameMaker production experience have shown this to not always the case. There have been many times over the years when I’ve had to try multiple techniques to produce a PDF from FrameMaker.
Here’s what I do, in this order:
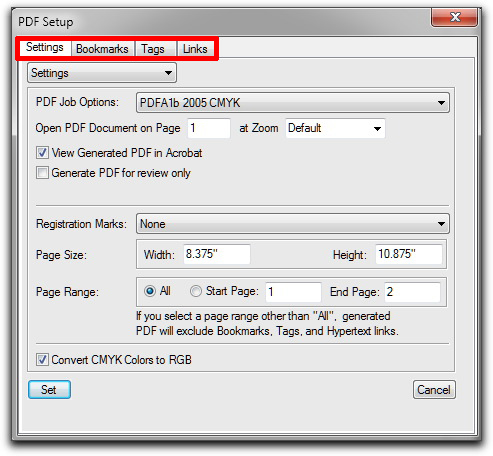
- File > Save as PDF. This is the recommended method of creating a PDF from FrameMaker. You can initiate this command from a book file or a document file. After choosing where to save your file, you will be presented with a dialog box to set up your conversion options, including Settings, Bookmarks, Tags & Links. Click Set to create the PDF.

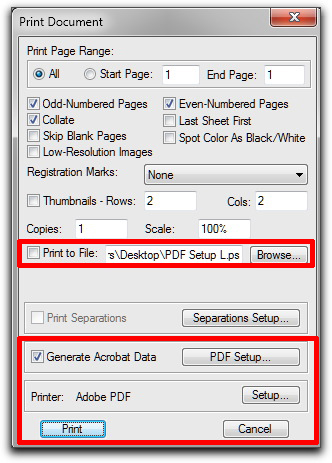
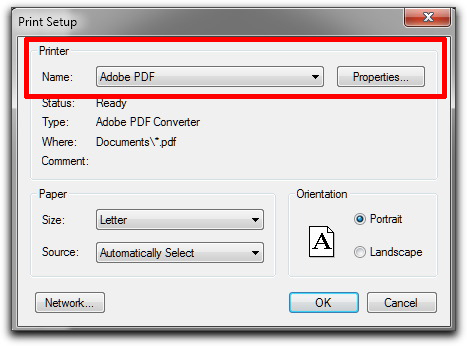
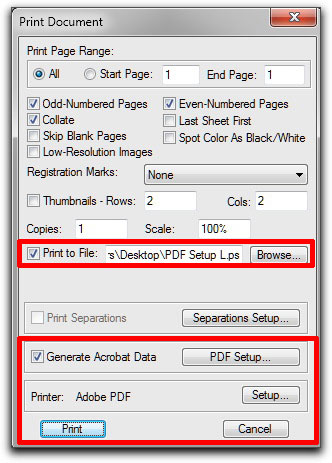
- File > Print > Adobe PDF Printer. Start by unchecking Print to File, and then click on the Setup button to choose the Adobe PDF printer.


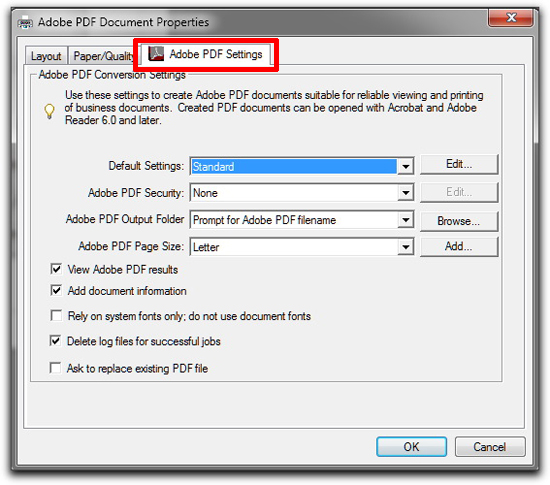
You have the option of clicking on the Properties button to make additional adjustments, including setting security options, viewing the results automatically, adding document information (which FrameMaker reads from File > File Info) and whether to rely on system fonts or document fonts. (If you need more information on system fonts vs document fonts see “Adobe FrameMaker: Rely on System Fonts Only, Do Not Use Document Fonts“.)

Pick OK twice to return to the Print Document Dialog box. The print option also gives you easy access to the PDF Settings dialog box. Click on Generate Acrobat Data and click the PDF Setup button to set up your conversion options, including Settings, Bookmarks, Tags & Links (shown below step #1). Double check that Print to File is still unchecked, and then chose Print when you are ready to go. - File > Print > Print to File. When all else fails, you can create a PostScript file and then convert it to a PDF in a two-step process.

Start by checking Print to File and use the Browse button to indicate where you want to save the file. You can set the filename and extension by typing in the text box to the right of the Browse button. (You can use the default .prn extension, or change it to .ps, it doesn’t make a difference.) If you’d like to Generate Acrobat Data you can use the same settings described in step number 2. Because the Print to File checkbox is activated, when you click the Print button, a PostScript file is created, but not the PDF. There are multiple ways to convert a PostScript file to a PDF. Perhaps the easiest one is to right click the file, and choose Convert to Adobe PDF.

I would be very happy to never see this combination of dialog boxes again. But in the meantime, I’m glad to have options!

I am using FM 2022, and have been having trouble with the Save as PDF. So I chose Print to PDF, and the distiller failed. I tried selecting all files in the book, right-clicking, and Print. I get the Print dialog box, and the distiller succeeded. So there is a book issue, not really sure what to do about that, but glad I found a workaround.