by Barb Binder, Adobe Certified Instructor on InDesign
For years, the way to set up a reverse head in InDesign was to define a ruling line above or below the heading, make it tall enough to cover the heading and then shift it up or down so that it sits nicely behind the heading. For more information on this workflow see, .
However, new versions of InDesign offer a feature called paragraph shading and this is a much quicker and easier way to accomplish the same task. What both techniques have in common is that you can save them as a paragraph style so that you can assign them with a single click. What makes this better is that if you add additional lines to the heading later, the paragraph shading just updates to accommodate the change.
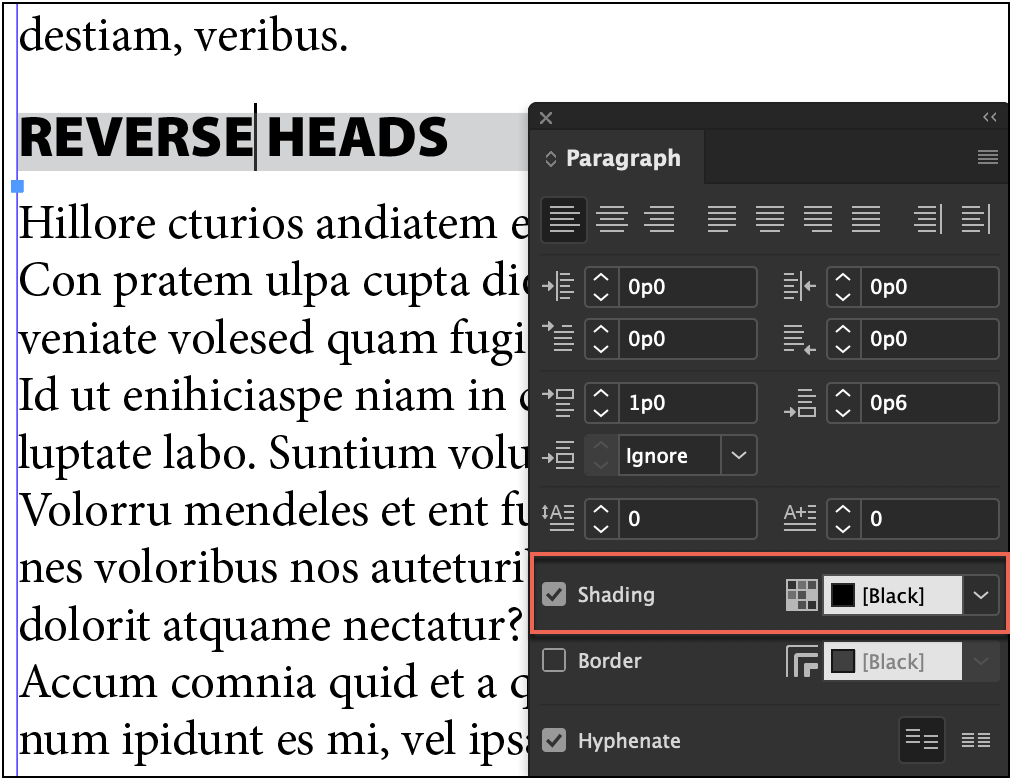
The paragraph shading controls are available in a several locations—I am using the Paragraph panel. There are three shading controls in the panel, but only two are obvious. The shading checkbox on the left allows you to enable or disable the shading. The color drop-down menu on the right allows you to select the color. But that icon with little squares that appears in betweeen? That allows you access the rest of the controls. Alt/Opt click it to open the Paragraph Borders and Shading dialog box.
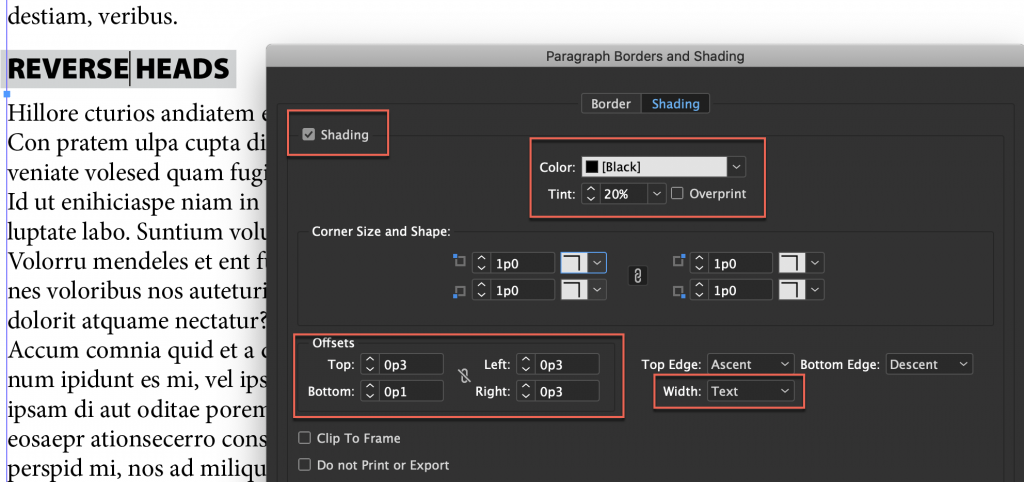
Now you can specify the tint, the corners, the offsets and more. In the screen shot below, I adjusted the offsets. Notice that the the shading is now extending beyond the left edge of the frame. There is a checkbox to Clip to Frame (try it) but that’s not really the result I’m looking for so I have it turned off. I also changed the Width to from Column to Text.
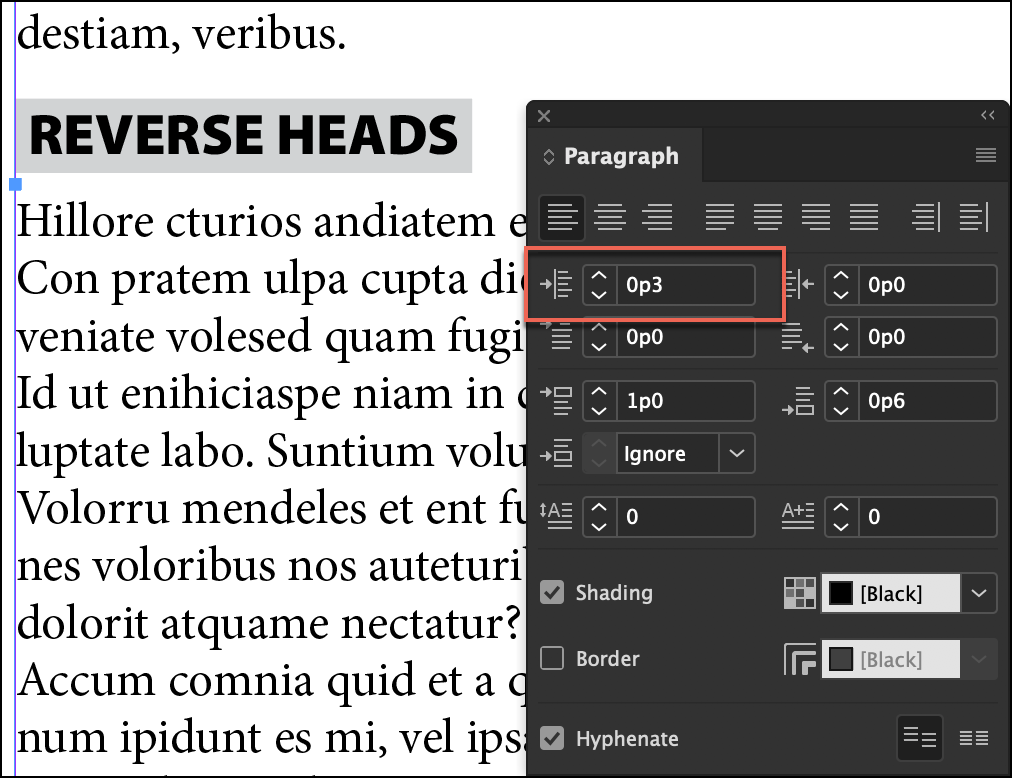
Instead of clipping the shading to the frame, I am going to set a left indent for my paragraph. This way, the shading is even on the left and the right sides and the shading stays inside of the frame. I will also change the text color to [Paper], which is defined as white in this document.
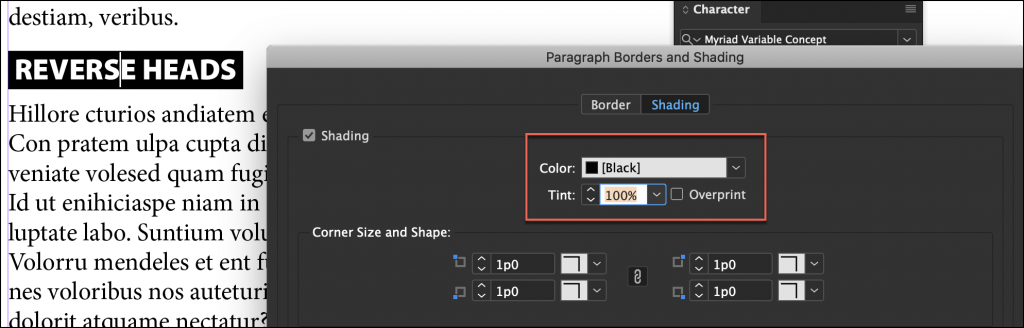
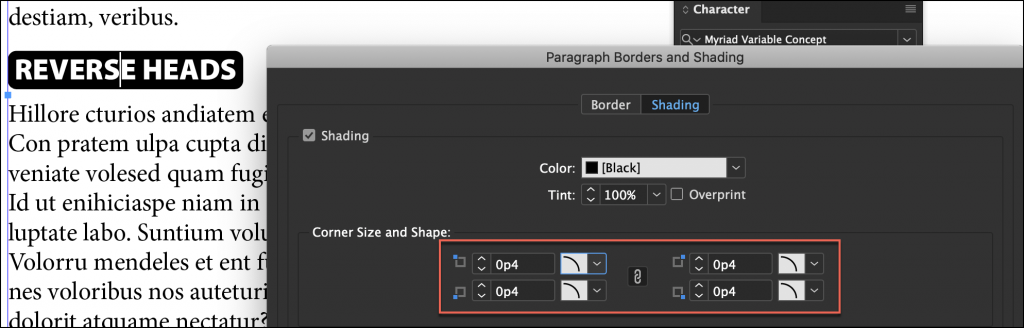
Now I can return to the Paragraph Borders and Shading dialog box to set my tint to 100%.
I can also very easily adjust any or all of the four corners.
Most importantly, when I get the look I’m after, I can update my paragraph style so that I can assign the reverse head with a single click. And if I add more text, the shading accommodates the edits.