Need training at your office? Request a quote for custom training.
Adobe Photoshop CS4: Fixing Blemishes
By Barb Binder
Graffiti. I expect to find it in the big cities, and even occasionally in small towns. But here we are outside the very small town of Moab, Utah and it’s everywhere. Even in the National Parks.
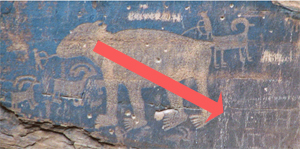
Okay, so most of the “graffiti” we found was rock art by the Anasazi and the Fremont tribes, like this ancient Indian bear petroglyph on Potash Road. But check out the signatures in the lower right corner. Do you really think the artists were Seth and Vicky?

I love this bear, but am not so thrilled to see the recently-added signatures. Luckily for me, it’s an easy fix in Photoshop CS4. Photoshop offers a number of flaw-correction tools for removing blemishes. Let’s try the Healing Brush on Seth and Vicky’s names.
- Open up an image with a blemish you would like to remove
- Select the Healing Brush
- Alt-click on a similar, unflawed area to set a sampling point. (I chose the relatively unblemished area above the letters “SE”.)
- Using short paint strokes, press and drag your mouse to paint over the flaw.
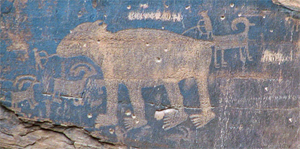
The result is nothing short of magical:

The Healing brush samples the texture, color and luminosity of an area, and then blends the sampled pixels into the area you are painting.