Need training at your office? Request a quote for custom training.
Adobe Photoshop: A Really “Cool” Type Effect
By Mike Meyer, Former Photoshop Student
Let’s say you are making a holiday card and you want to add a little snow to your text for a wintery feeling.
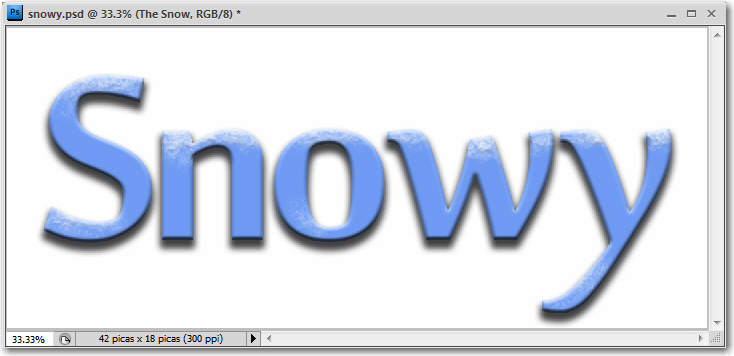
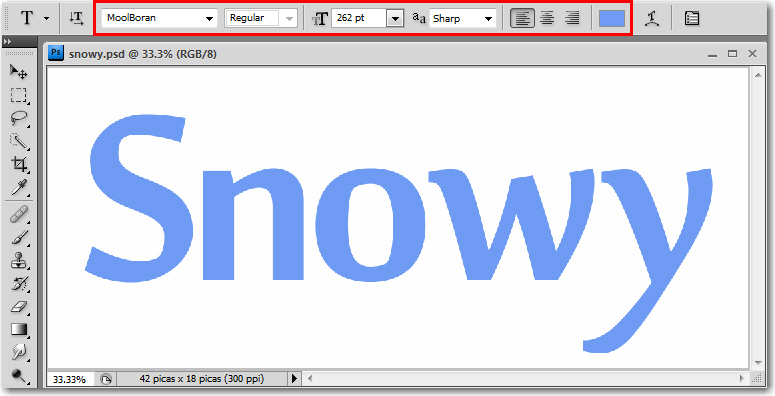
- Open an existing image or create a new document and type in some text.
- Highlight the text and set your typeface, style, size and color in the Options bar. (I’m choosing a cool color to convey that chilly feeling.)

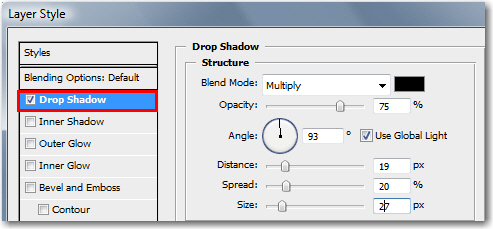
- With the Type layer selected, choose Layer > Layer Style > Drop Shadow. You can play with the Drop Shadow structure (opacity, angle, distance, spread and size) until you achieve the effect you are looking for, but don’t choose OK yet.

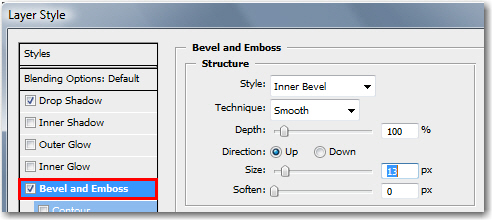
- Click the words “Bevel & Emboss” in the style category list on the left. Pick your favorite style and/or structure settings and now you can click OK.

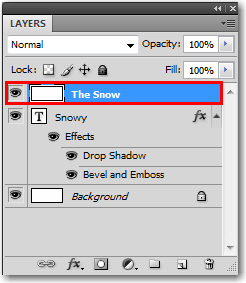
- Create a new layer for the snow with Layer > New > Layer. I called mine “The Snow”. Make sure it is on top of the Type layer in the Layers panel.

- Press the letter D on the keyboard to reset the default colors, and then press X to reverse the colors so that White is the foreground color.

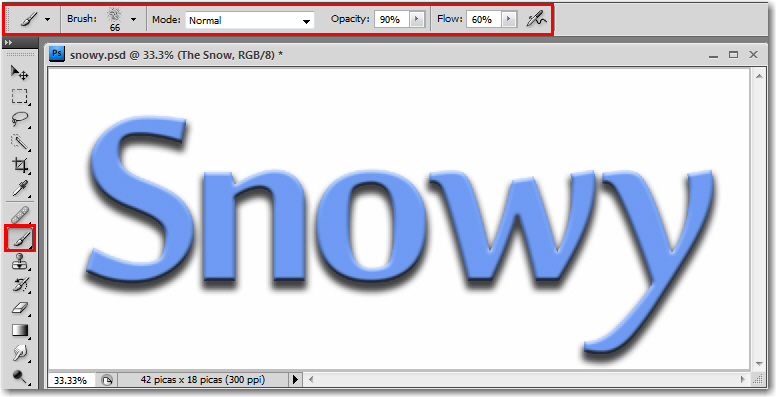
- Select the Brush tool from the Toolbox, and pick the following options from the Options bar: Brush: Dry Brush Tip Light Flow; Opacity: 70%; Flow: 60%.

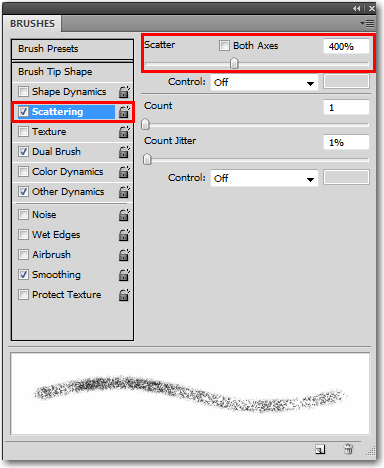
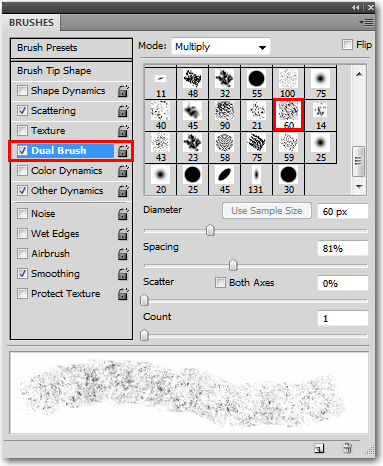
- Open the Brushes panel with Window > Brushes and make the following changes to soften the look of the snow:
- In the Scattering category list on the left, change the Scatter slider to about 400%.

- In the Dual Brush category, select the Sampled Tip 60 Brush.

- In the Scattering category list on the left, change the Scatter slider to about 400%.
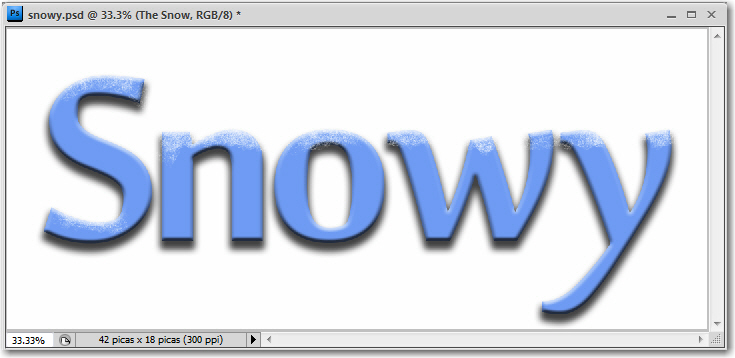
- To add the snow press your mouse button down and drag over the letters. Don’t worry about the snow overlapping the background.

- Add a little depth to the snow by adding a Bevel and Emboss layer style (Layer > Layer Style > Bevel and Emboss).

- Wow! The snow looks great over the text, but it’s a bit messy in the background. Let’s clip the snow to the Type layer:
- Select “The Snow” layer.
- Layer > Create Clipping Mask (the arrow to the left of The Snow layer indicates that the pixels on the top layer are clipped to the lower layer).

Brrrr. Just looking at it makes me feel cold.
