by Barb Binder, Adobe Certified Instructor on FrameMaker
One of my Adobe FrameMaker students reached out this morning and asked how to output to PDF/X-4 in FrameMaker 16. It was a great question, because that option does not appear FrameMaker’s default preset list in the Publish pod.

All my student needed to do was to locate the folder containing the extra PDF presets that ship with FrameMaker, copy one (or more) from that folder and paste it into a different folder for FrameMaker to offer it in the Preset list.
How to make a new PDF preset available in FrameMaker
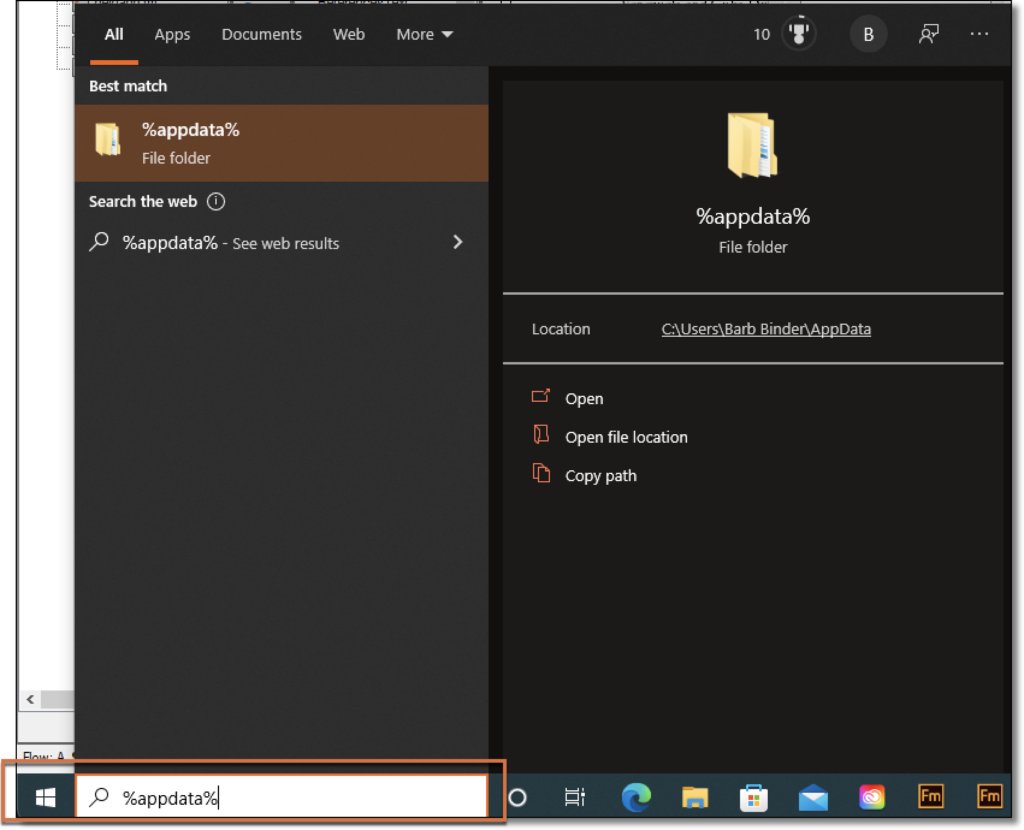
The extra presets are stored in the Roaming folder, which can be hard to locate. The easiest way to find it is to type in %AppData% into the Windows Start Menu, and press Enter. Windows will open the Roaming folder, and you can navigate from there.
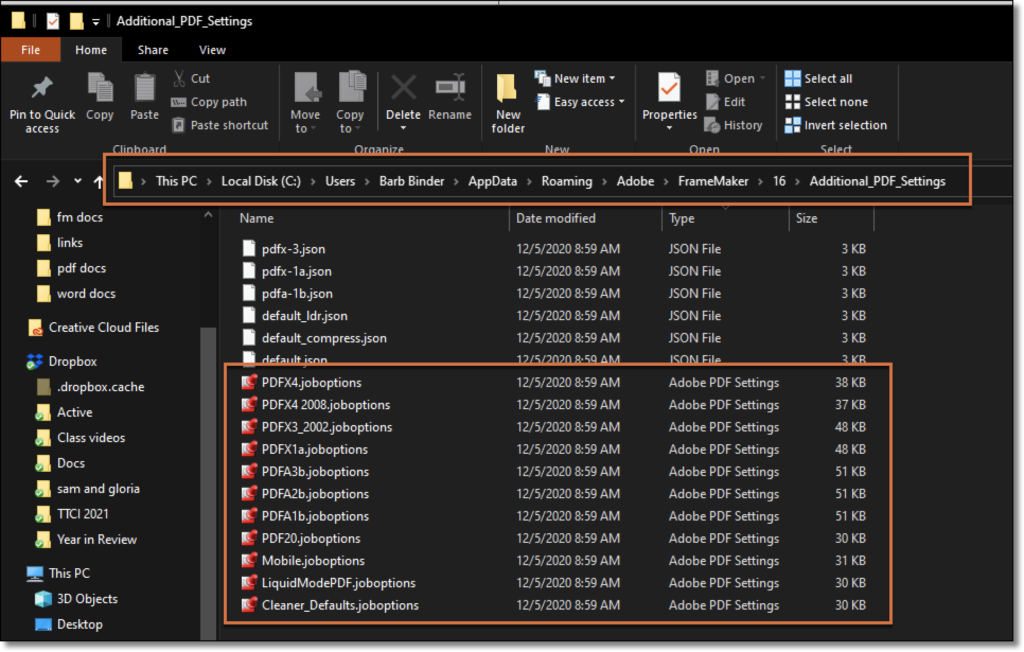
Once in the Roaming folder, navigate to Adobe > FrameMaker > [VersionNumber] > Additional_PDF_Settings. Sort by Type and all of the extra presets (also called .joboptions files because of their extension) will be listed together. (The full path outlined in the screen shot below, if that is easier.)
Copy the preset(s) you need.
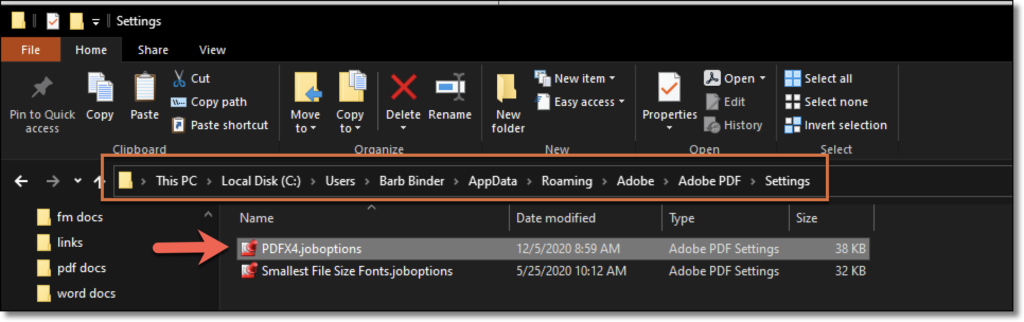
Head back to the Roaming folder and navigate to Adobe > Adobe PDF > Settings. Paste the .joboptions file into the Settings folder.
Close the Publish Settings dialog box and reopen it. Your newly-pasted presets will appear in the Preset Name list. 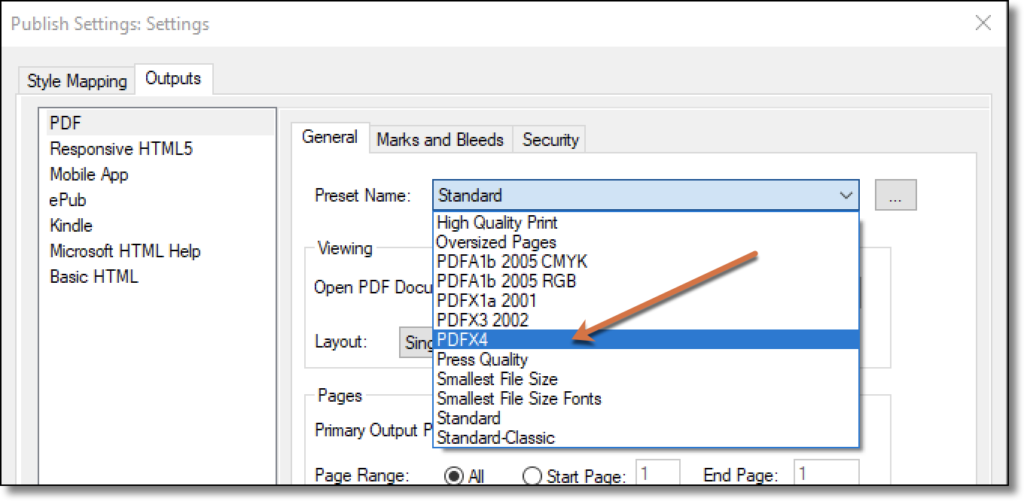
Hi,
Thanks very much for this information.
We tried this out. However, our FM shows still no job options in the Publish setting drop-down menu. The three points on the right show this: C:\Program Files\Adobe\Adobe FrameMaker 2022\fminit
It obviously has the wrong path. How can I fix this?
Hi Andrea:
I’m unclear what you’re referring to when you say “the three points on the right”. Please take a moment to go back and reread the post. It explains and shows the path (outlined in orange in the screen shots) that you will need to follow to find both the default job options as well as the additional job options that are included with FrameMaker, but not listed until you copy them over to the PDF Settings folder. Both are under the Roaming folder and not C:\Program Files\Adobe\Adobe FrameMaker 2022.
~Barb
Hi Barb,
Thank you for the fast response.
I followed the steps, and it didn’t work.
What I mean with the three dots is the gray menu beside the drop-down menu. It doesn’t show the Settings folder, but this path: C:\program files\adobe\adobe framemaker 2022\filters.
It looks as if Framemaker can’t find the folder with the settings. Even though I copied the job options as described, the preset name drop-down is still empty. I can publish a PDF with the “print book” menu (and high-quality print options only), but I can’t create a PDF with “Save as pdf”. In this case, Framemaker searches for a distiller (which the 2022 version shouldn’t need with its integrated PDF maker). We try a deinstillation of Acrobat, the Distiller and Framemaker and set it up again. Hopefully it will work.
Hi Andrea:
So I think you’re asking a different question then is actually covered on this blog post. I think you have lost the settings file (.STS) and not the PDF job options (.JOBOPTION). The reinstallation should take care of it.
But you can also just create a new settings file and put it anywhere you want. In the publish pod, you can click the icon to the right of the words Settings File, choose New, and then create one from scratch.
I use this blog primarily to answer questions from my students and to provide additional learning opportunities beyond their training classes, but a blog limitation is that we can’t add screenshots in the comments.
If you have additional questions, go ahead and ask on the Adobe FrameMaker Community forum. You can include screenshots, and I’m happy to continue this conversation with you other there. The other advantage is if I’m in class and can’t answer a question quickly, somebody else will definitely chime in. https://community.adobe.com/t5/framemaker/ct-p/ct-framemaker?page=1&sort=latest_replies&filter=all&lang=all&tabid=discussions
~Barb