Need training at your office? Request a quote for custom training.
Adobe FrameMaker: Adding Bleeds and Trim Lines
by Barb Binder, Adobe Certified Instructor on FrameMaker
A question came up today about how to set up a graphic that bleeds off the side of page in FrameMaker. It’s not intuitive, but it can be done.
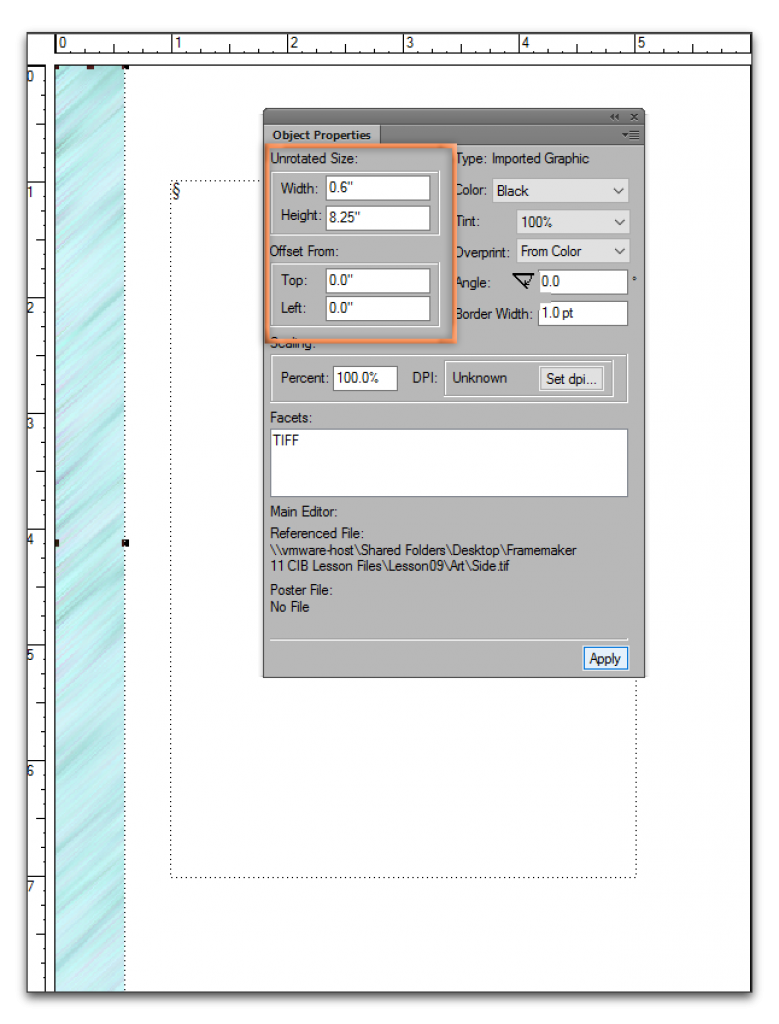
In the image below, I added a banner to the left side of the page. The paper size is 6″ x 8″. The banner is 0.6″ x 8.25″. For an 1/8″ bleed (0.125″) on three sides, the banner is 1/8″ wider and 1/2″ taller than needed. In the image directly below, the offset is 0 from the top of the page and 0 from the left, so the bottom is not visible. You can still see the other sizing handles.
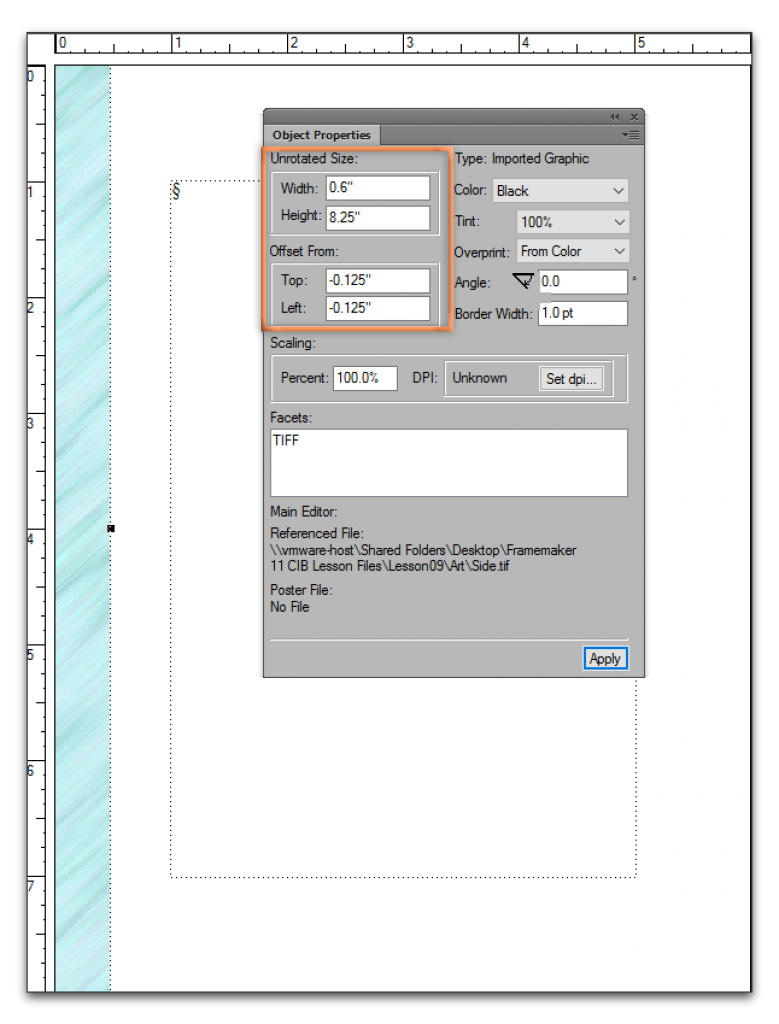
To shift the banner up and left, go to Graphics > Object Properties and change the Top and Left Offsets to -0.125″. (Positive values move the image down and right, negative values move it up and left.) Note: you won’t ever see the bleed in FrameMaker, but you can see the offset values and the missing handles.
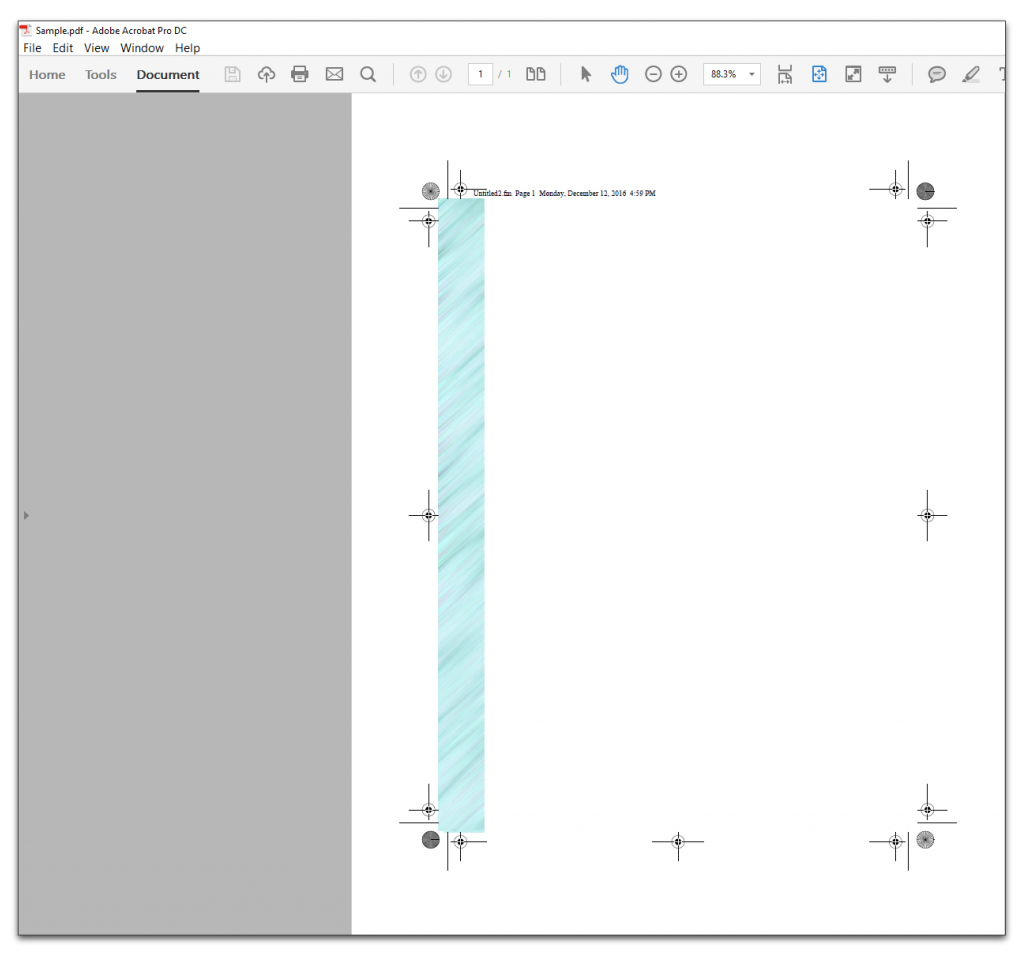
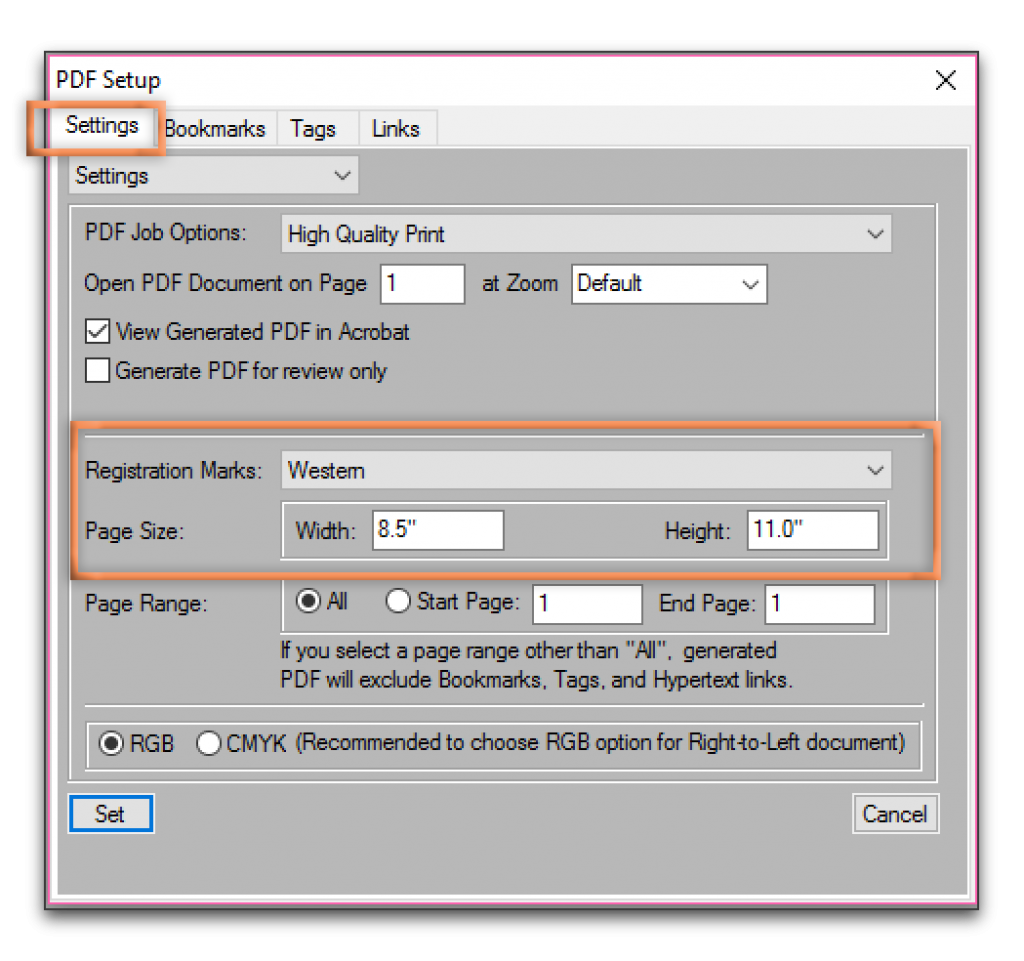
To confirm the bleed, print or create a PDF with the page size set larger than the actual size, and the Registration Marks set to Western.
You can see the trim lines and the bleed in Acrobat (or if you print it).