Need training at your office? Request a quote for custom training.
Adobe Photoshop: Layer Comps
by Barb Binder
To be able to use Photoshop successfully, even at an introductory level, you need to understand Layers. But what about Layer Comps? I’m always amazed by how many of my advanced Photoshop students look at me blankly when I ask if they are using Layer Comps.
It’s got to be one of the easiest, and most useful, layer features. Here’s the concept: let’s say you are working on the design of a Photoshop document for your client (or boss). You’ve come up with a couple of good ideas and have set up layers show the various options, and now you want to review them with your client. Instead of making them watch you as you scroll up and down the Layers panel to hide and show the various layers that make up each design, take a moment to save each design as a Layer Comp. Then, when you are ready to show off your ideas, you can hide all of the panels except Layer Comps and just toggle through them. This keeps the client’s focus on your work, and keeps them from getting distracted by the complex Photoshop UI.
Here are the specifics:
- Create your document using layers to hide/show the design variations, including layer effects and smart filters.
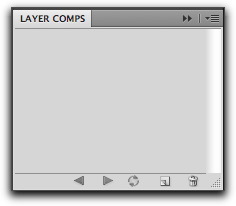
- Chose Window > Layer Comps

- Return to the Layers panel and carefully set the visibility settings for the first comp, hiding the layers you don’t want them to see, and showing the ones you do.
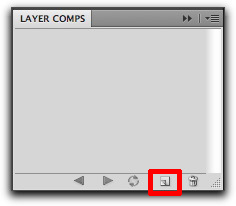
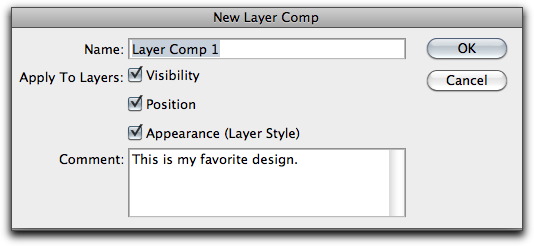
- Return to the Layer Comps panel and save the layer display settings as a Layer Comp.


- Repeat steps 3-4 for each design variation.
- Save the file.
- Close all of the panels except for the Layer Comps panel.
- Call the client over to your computer.
- Use the Next/Previous Layer Comp buttons to cycle through the various design options, until they settle on their favorite.

Now, if you want to get really clever, go to Edit > Keyboard Shortcuts, set the “Shortcuts for” to Panel Menus and set up keyboard shortcuts to cycle through the comps. I use Cmd Sh + and Cmd Sh – to go the next comp and previous comp, respectively. Then I can close all of the panels (pressing the Tab key is the quickest way to hide all of panels at once), go to Full Screen Mode (tap f f) and just rely on the keyboard to display each comp. (Press Tab again to show all the panels, and f to return to Standard Mode.)


Very clear and easy to follow steps for creating layer comps. Extremely useful for showing options and changes in files without getting bogged down in the layers panel. Thank you. By the way, most of the books on Photoshop just don’t mention this feature, which is why many Photoshop students aren’t aware. I first became aware of the term taking an InDesign course.
Hi Karen: I always teach Photoshop layer comps in my Advanced InDesign classes, too. It’s pretty cool that InDesign understands them, and lets you hide and show them without having to open up Photoshop.
~Barb
Thanks for this – very easy to understand
The Layer Comps panel is already great but cycling through each with a keyboard shortcut is the icing on the cake. Thanks for the tip 🙂