Need training at your office? Request a quote for custom training.
Adobe InDesign: Header Rows
By Barb Binder, Adobe Certified Instructor on InDesign
Updated: Dec 11, 1016
When you create a long table, the table may span more than one column, frame, or page. You can use header rows to repeat the information at the top or bottom of each divided portion of the table.
You can create Header Rows in InDesign when you insert a table:
- Place your cursor where you’d like to add the table
- Table > Insert Table
- Choose how many Header Rows you’d like and click OK
Or you can convert Body Rows to Header Rows once the table has been imported into InDesign from Word:
- Select the rows at the top of the table to create header rows, or at the bottom of the table to create footer rows.
- Choose Table > Convert Rows > To Header
For years, I was under the impression that Word didn’t support Header Rows, mostly because I never received any tables with Header Rows predefined from any of my authors. Turns out, they just didn’t know how to create them. If you have writers working for you, why not teach them how to create the Header Rows in Word, and that can be one less thing for you to do. Here’s how:
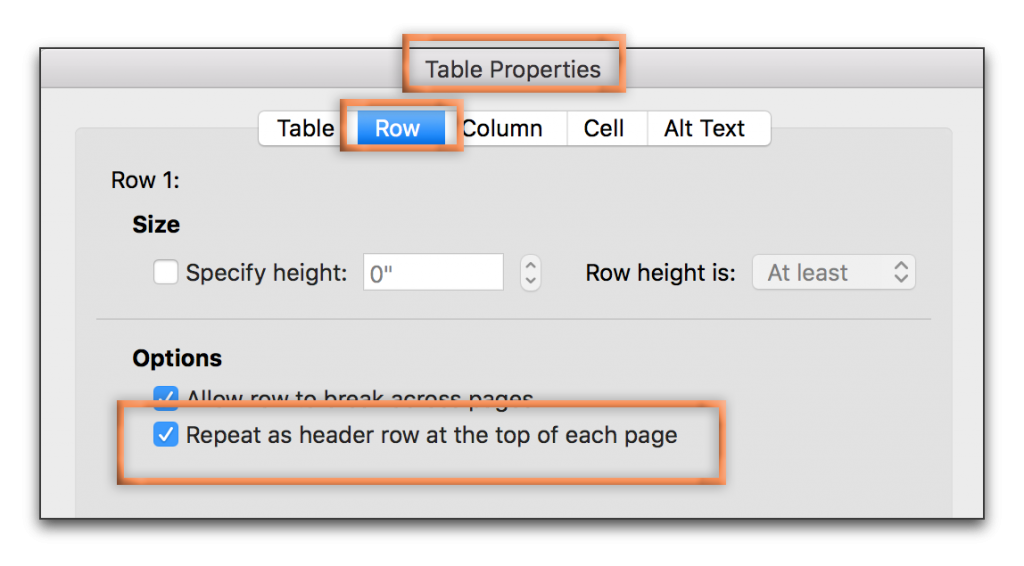
- In Microsoft Word 365, navigate to the first table.
- Select the heading row or rows.
- Table > Table Properties > Row
- Enable the checkmark for Repeat as header row at the top of each page.

- Repeat for any additional tables.
- Save the Word file.
When you place the Word file into InDesign, the table rows will already be designated
2 thoughts on “Adobe InDesign: Header Rows”