Need training at your office? Request a quote for custom training.
Adobe FrameMaker: Setting Tabs, Part III
by Barb Binder
If you’ve worked your way through the posts on Setting Tabs, Part I and Setting Tabs, Part II, you’ve learned how to set tab stops and how to modify them. Let’s finish up by learning how to work with dot leaders.
Dot Leaders in a Table of Contents
The typical table of contents will display leader dots between the entry and the page number. Should you press the period key repeatedly to add these dots? Nooooo! Try this, instead.
- Open a new, portrait document.
- Select the Right-align tab from the Paragraph Formatting toolbar.

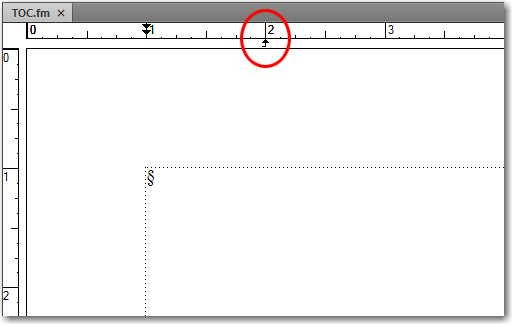
- Click under the ruler to set a right-align tab stop under the 2 inch mark.

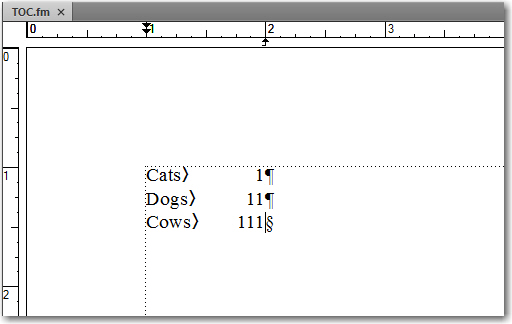
- Type in the following:

- Select all of the lines and create a Paragraph format called “TOC leaders”.
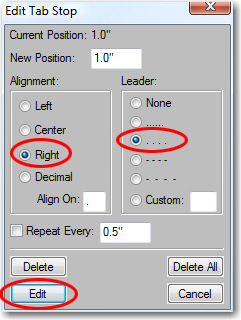
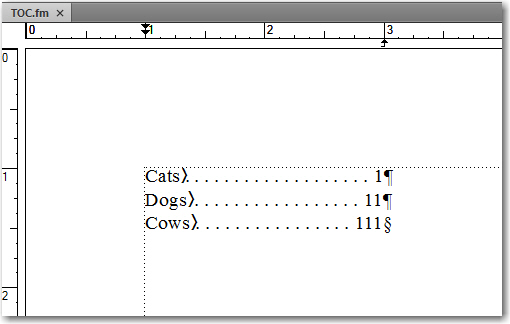
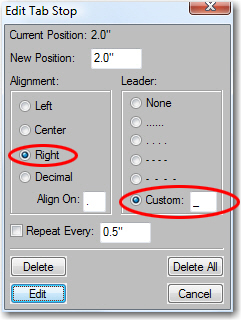
- Double click the tab arrow to open the Edit Tab Stop dialog box. Confirm that you have alignment set to right in the left column, and pick one of the leader options from the right column. (I prefer the ones that are a little more spread apart.)

- Click Edit and then Update All (in the Paragraph Designer). Remove Overrides.

Nice, and if you need to adjust the position of the page numbers, just drag the tab arrow left or right. The leader will adjust accordingly. Finish up with another Update All, remove Overrides.
Dot Leaders in a Form
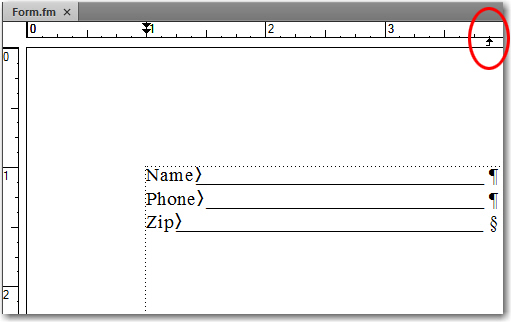
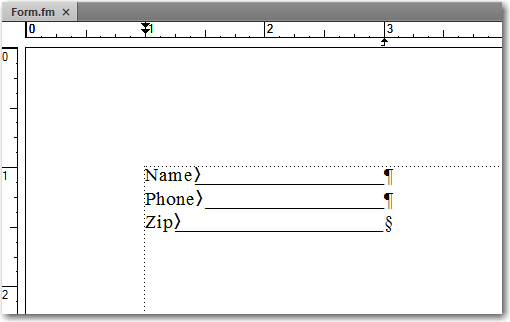
This same exercise can be used for forms that require lines. The only difference is that we use a line leader instead of a dot leader:
- Open a new, portrait document.
- Select the Right-align tab from the Paragraph Formatting toolbar.

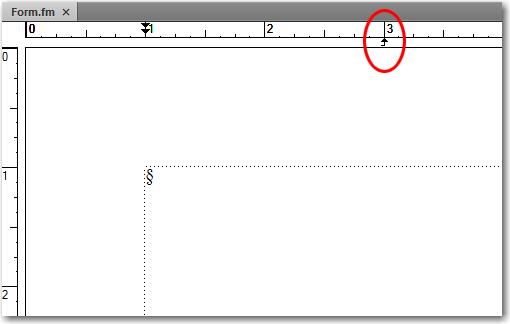
- Click under the ruler to set a right-align tab stop under the 3 inch mark.

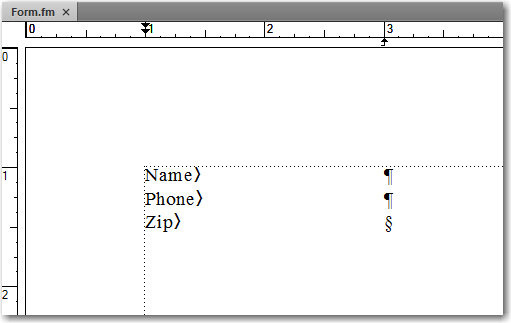
- Type in the following:

- Select all of the lines create a Paragraph format called “Form”.
- Double click the tab arrow to open the Edit Tab Stop dialog box. Confirm that you have alignment set to right in the left column, and type an underline (Shift+hyphen) into the Custom leader text box.

- Click Edit and then Update All, remove overrides.

That was extremely simple, and best of all, you can drag the tab arrow left or right to adjust the length of the lines.
Thank you for this instruction guide.
Very nice instructions that you gave to us.