Need training at your office? Request a quote for custom training.
Adobe FrameMaker: Controlling Space Above Tables
by Barb Binder, Adobe Certified Instructor on FrameMaker
Updated: Mar 17, 2016
From a past Rocky Mountain Training student:
Hi Barb! Can you help me with something? How do I reduce the space between the image and the table? Thanks for any help you can offer. I’m stuck!
I see a few options to reduce the space above the table:
- Reduce the value in Table Designer > Basic Properties > Indents & Spacing > Above.
- Create a paragraph format for the otherwise-empty ¶ holding the anchor and reduce the values for Paragraph Designer > Basic > Indents & Spacing > Above Pgf and Below Pgf.
- Move the anchor up the end of the previous paragraph (placing it directly after the frame anchor).
One of these should give you the spacing you need, or maybe you need to combine 1 and 2 or 1 and 3 together.
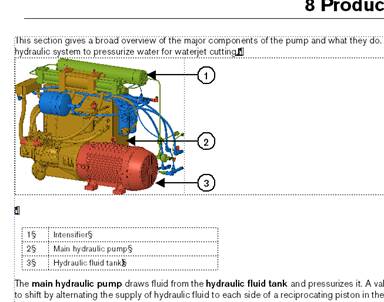
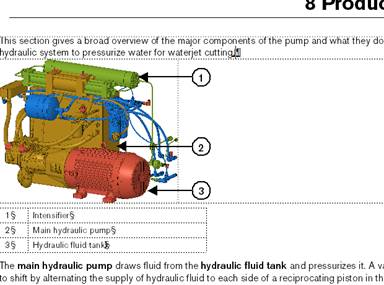
I used #1 and #3. I deleted something right after the period following “cutting” in the first paragraph* and the table moved up and the paragraph symbol between the image and the table disappeared. Then I made a table style called Explanation and changed the Spacing>Above from 15 pt to 4 pt.
Thanks so much Barb, that did the trick!
* What she deleted was the hard return seen at the end of the paragraph above the table. By removing it, the table anchor moved up to the end of the paragraph, along with the hard return that followed it.
The table anchor is now at the end of the paragraph, directly after the frame anchor. If you are thinking that you can’t see two anchors at the end of the paragraph, it’s not your eyes, it’s the FrameMaker display. Consecutive anchors display directly over the previous anchor, so you can’t tell by looking if there is one anchor or 200 at the end of a paragraph. You can arrow between them, or look at the contents of the page to figure it out.
Hi, Barb,
Your last paragraph discusses consecutive anchors. In my new job, a very large number of single/double cell tables, especially, were anchored consecutively at the ends of body text paragraphs. As most of the staff here are fairly new to FrameMaker, it was difficult for them to, for example, place new body text between these tables; you can’t just click between them and get a flashing cursor for text entry.
We now use a paragraph tag called, appropriately enough, “Anchor.” Spacing Above Pgf/Below Pgf are set to zero, and Line Space is set to 3 pt. Default Font size is set to 2 pt. When you apply the Anchor paragraph, the tiniest of flashing cursors displays at the left margin, and that is where you insert your tables or anchored frames. If I need another table or frame immediately after the first one, I apply another Anchor paragraph, then do the subsequent insertion. That way, I can get in between the tables/frames and add text, or I can select the Anchor to grab the table/frame if I need to move it. This allows for an economical way to manage these items individually, rather than trying to find that invisible anchor among many.
By combining this little trick with a change to the table Space Above value from 12 pts. to zero pts, we were able to reduce page count in one manual from 352 pages to 284!