Need training at your office? Request a quote for custom training.
Adobe FrameMaker: Adding Text After Select Index Entries
by Barb Binder, Adobe Certified Instructor on FrameMaker
From a recent Rocky Mountain Training Advanced Adobe FrameMaker 11 student:
Hi, Barb. Here’s a question for you. I want to be able to produce an index with entries similar to the following:
If I’m reading Frame’s online help correctly, I SHOULD be able to automate adding the “(standard)” after the appropriate page numbers using different markers and then defining the formatted text for the markers on the reference page for the index file.
The problem is, I can’t figure out exactly what to edit on the reference page to get this to work.
I’ve got two markers for indexing in my book: Index and IndexStandard. I’ve used both. I have successfully generated an index file in which I include both marker types, and have verified that text from both types appear in the index. I have tried adding the marker, IndexStandard, to my index file. I’ve even tried closing and reopening the book, deleting, and regenerating the index.
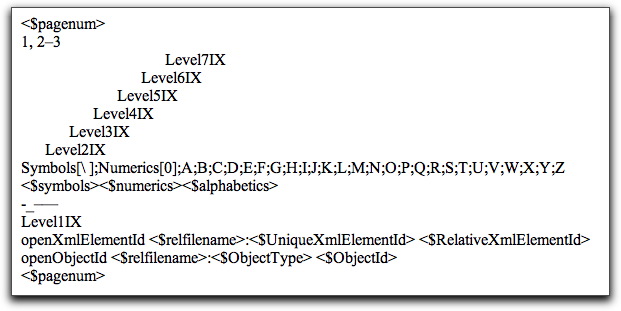
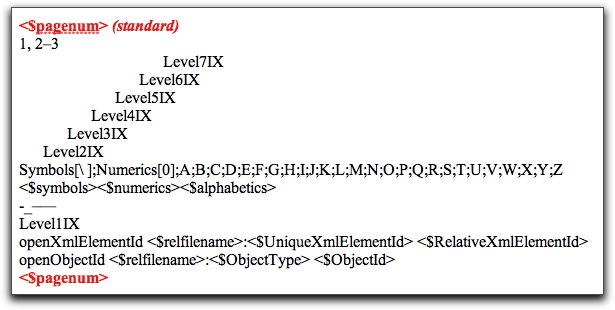
However, when I go to the reference page, I don’t see that either marker is being referred to specifically, and I haven’t been able to figure out how to “edit the special flow for the marker types” as the instructions say. Any ideas? I’ve included the special flow from my index file below.
Before the sharing the answer, I first want to say thank you to my student for trying to hard to solve this on her own. And she came so close! The answer is visible in the screen shot above, but I sure didn’t see it the first time I looked.
The Setup
Let’s start out by reviewing what she already figured out. For custom text to appear after some of the index entries, she needed to add a new index marker type to one of the chapters within her book with Special > Marker.
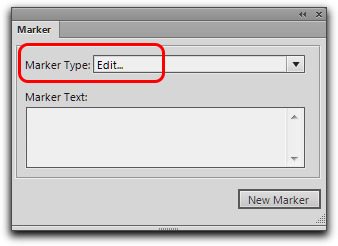
She picked Edit… from the Marker Type menu and entered IndexStandard as a Custom Marker Type. Then she clicked Add.
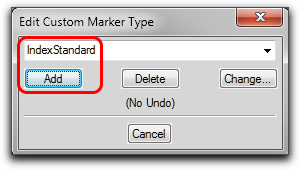
The new marker type needs to be in any of the chapters that will be using it, so the next step is to import the new index marker type into the other chapters of the book with File > Import > Formats.
Next, she would move on to entering index codes, using Marker Type: Index for the regular look, and Marker Type: IndexStandard for the entries where she wants the additional text to appear.
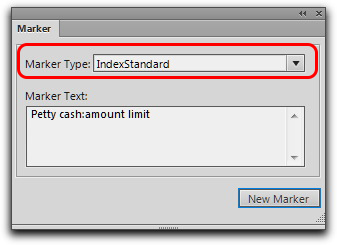
Once all of the index codes have been entered, the next step is to save all files in the book, and then update the book.
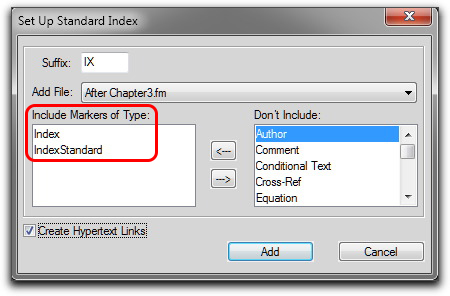
Next she generated the index. In the book window, she chose Add > Standard Index. The only twist is to remember to add both Index types to the list on the left. Then she clicked on Add.
The index will be generated with its initial formatting based on the first non-generated file in the book window. If she wasn’t using an index template, then she would need to spend some time to make it look pretty. This takes us up to the point where she states: “The problem is, I can’t figure out exactly what to edit on the reference page to get this to work.”.
The Finale
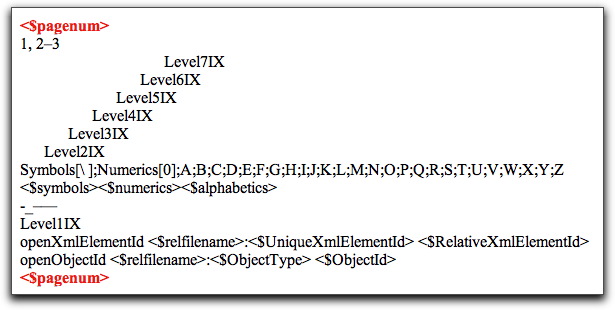
The answer lies on the IX reference page. If you look at her screen shot again, you will see two <$pagenum> building blocks, highlighted in red, below. One will be called IndexIX, the other will be be IndexStandardIX, and she can determine which one is which by clicking on the building block, and reading the name in the lower left corner of the status bar.
To wrap this up, all she needs to do is add the word “(standard)” after the IndexStandardIX <$pagenum> building block, apply her character tag to set the text to italic.
When she saves her work and updates her book, she’ll be good to go!
Eureka! I saw that <$pagenum> was in there twice, but I’m not experienced enough with Frame to realize that that was odd. Sure enough, the status bar showed IndexStandard as being applied to the top one and Index as being applied to the bottom. I reran the index and it worked! Thank you for your help!

